These are all my pieces:
Two 10 inch rounds
Two 6 inch rounds
6 soup can cylinders (3 of them with the top leveled off)
7 bamboo sticks for structural support
1 tub of buttercream frosting (from Michael's or JoAnn's)

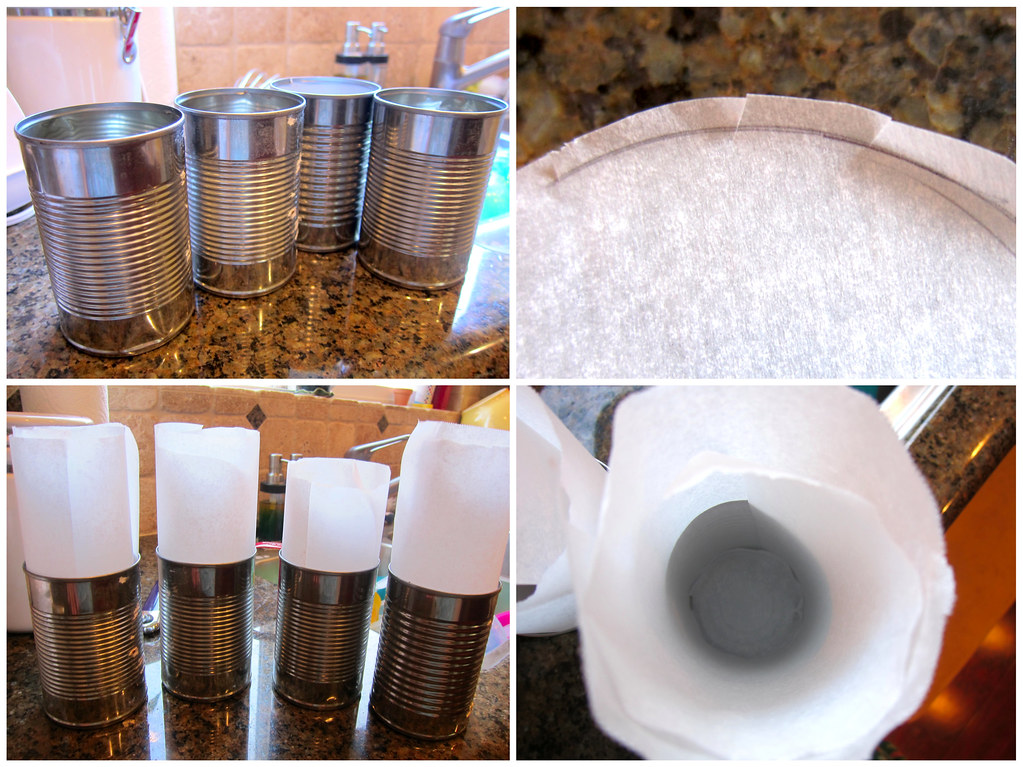
The towers were made from soup cans!
I took the label off and gave them a good washing. I used parchment paper to line the bottom of the can. I used the can to draw a circle, cutting it out slightly larger, and then little snips on the edges, as shown below.
Then I lined the sides of the can, and make sure it's a good few inches taller than the can because the cake will rise:
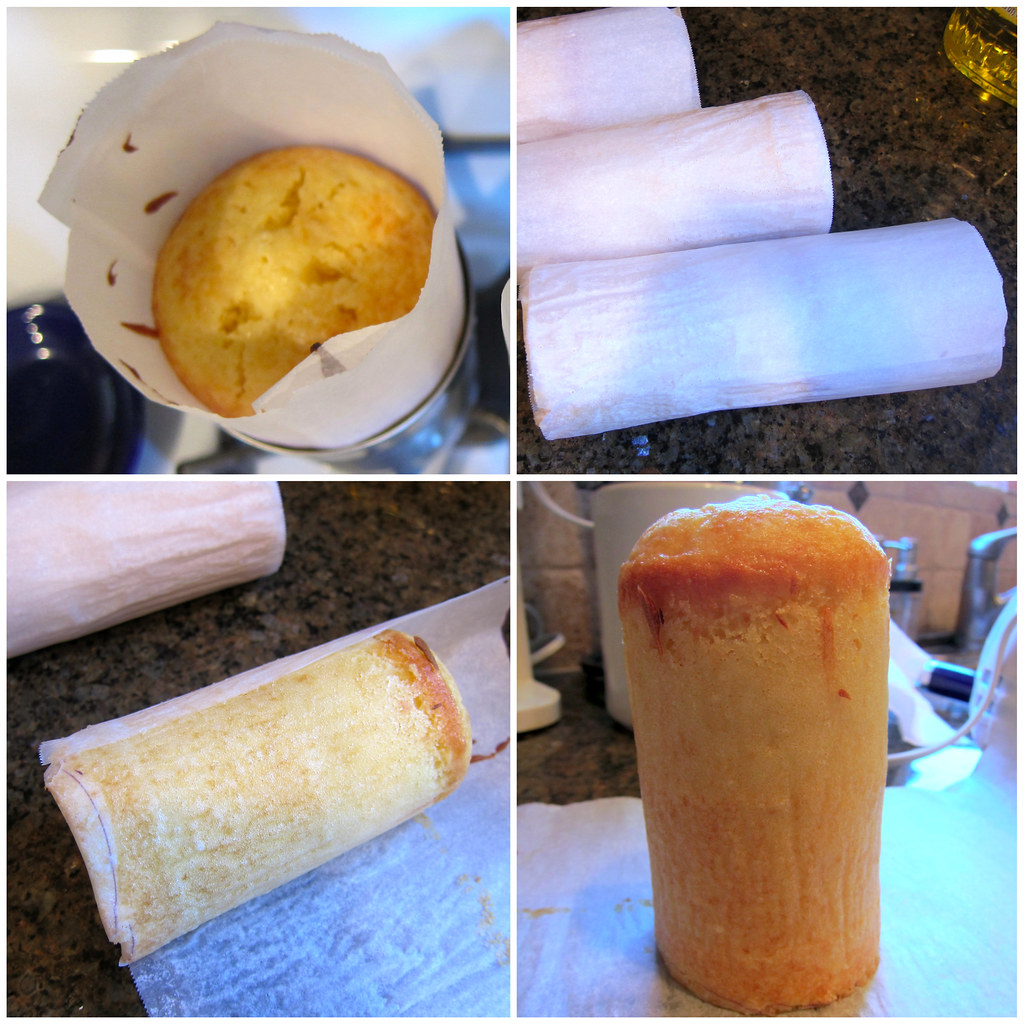
I filled up about 2/3 of the can with the batter. I baked them at 350 degrees for 40 minutes. I had no issues with the cake sticking. It came out easily. I rolled it out of the parchment paper and peeled the bottom off:
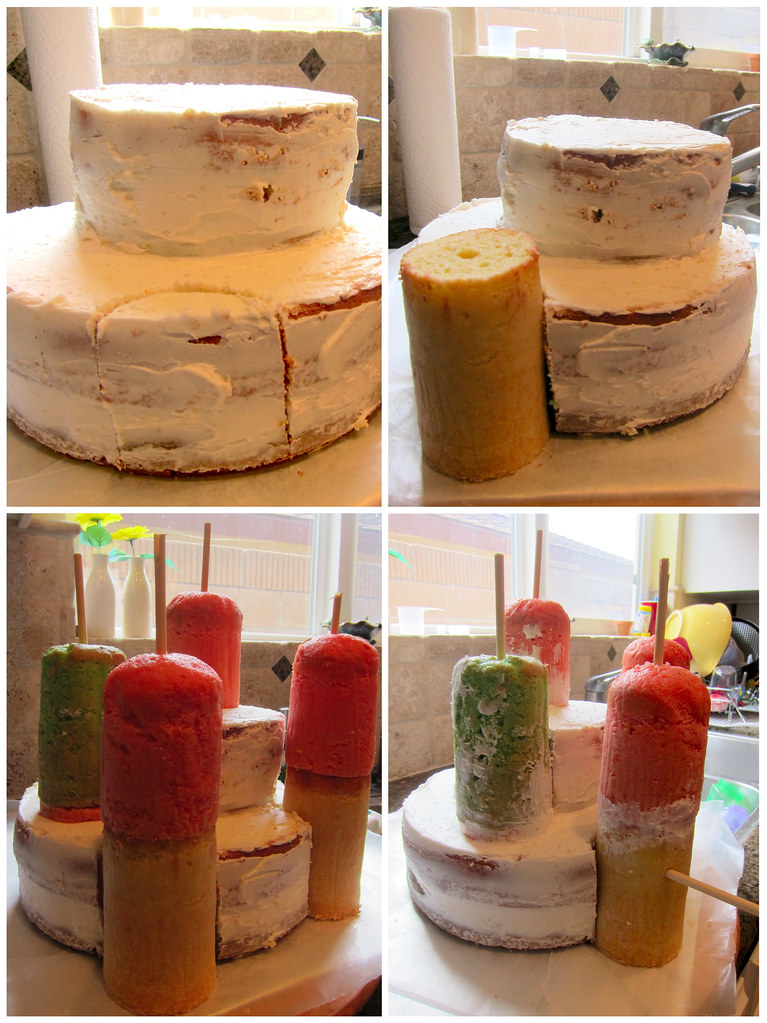
When the cakes were cooled, I stacked the round cakes together after leveling them off, making sure the top layer is flipped upside down. Then I did a light crumb coat. I used the soup can to trace out part of the circle where the towers will fit in. Then cut it out.
I stacked the towers on, secured with bamboo sticks, and chilled it in the fridge:
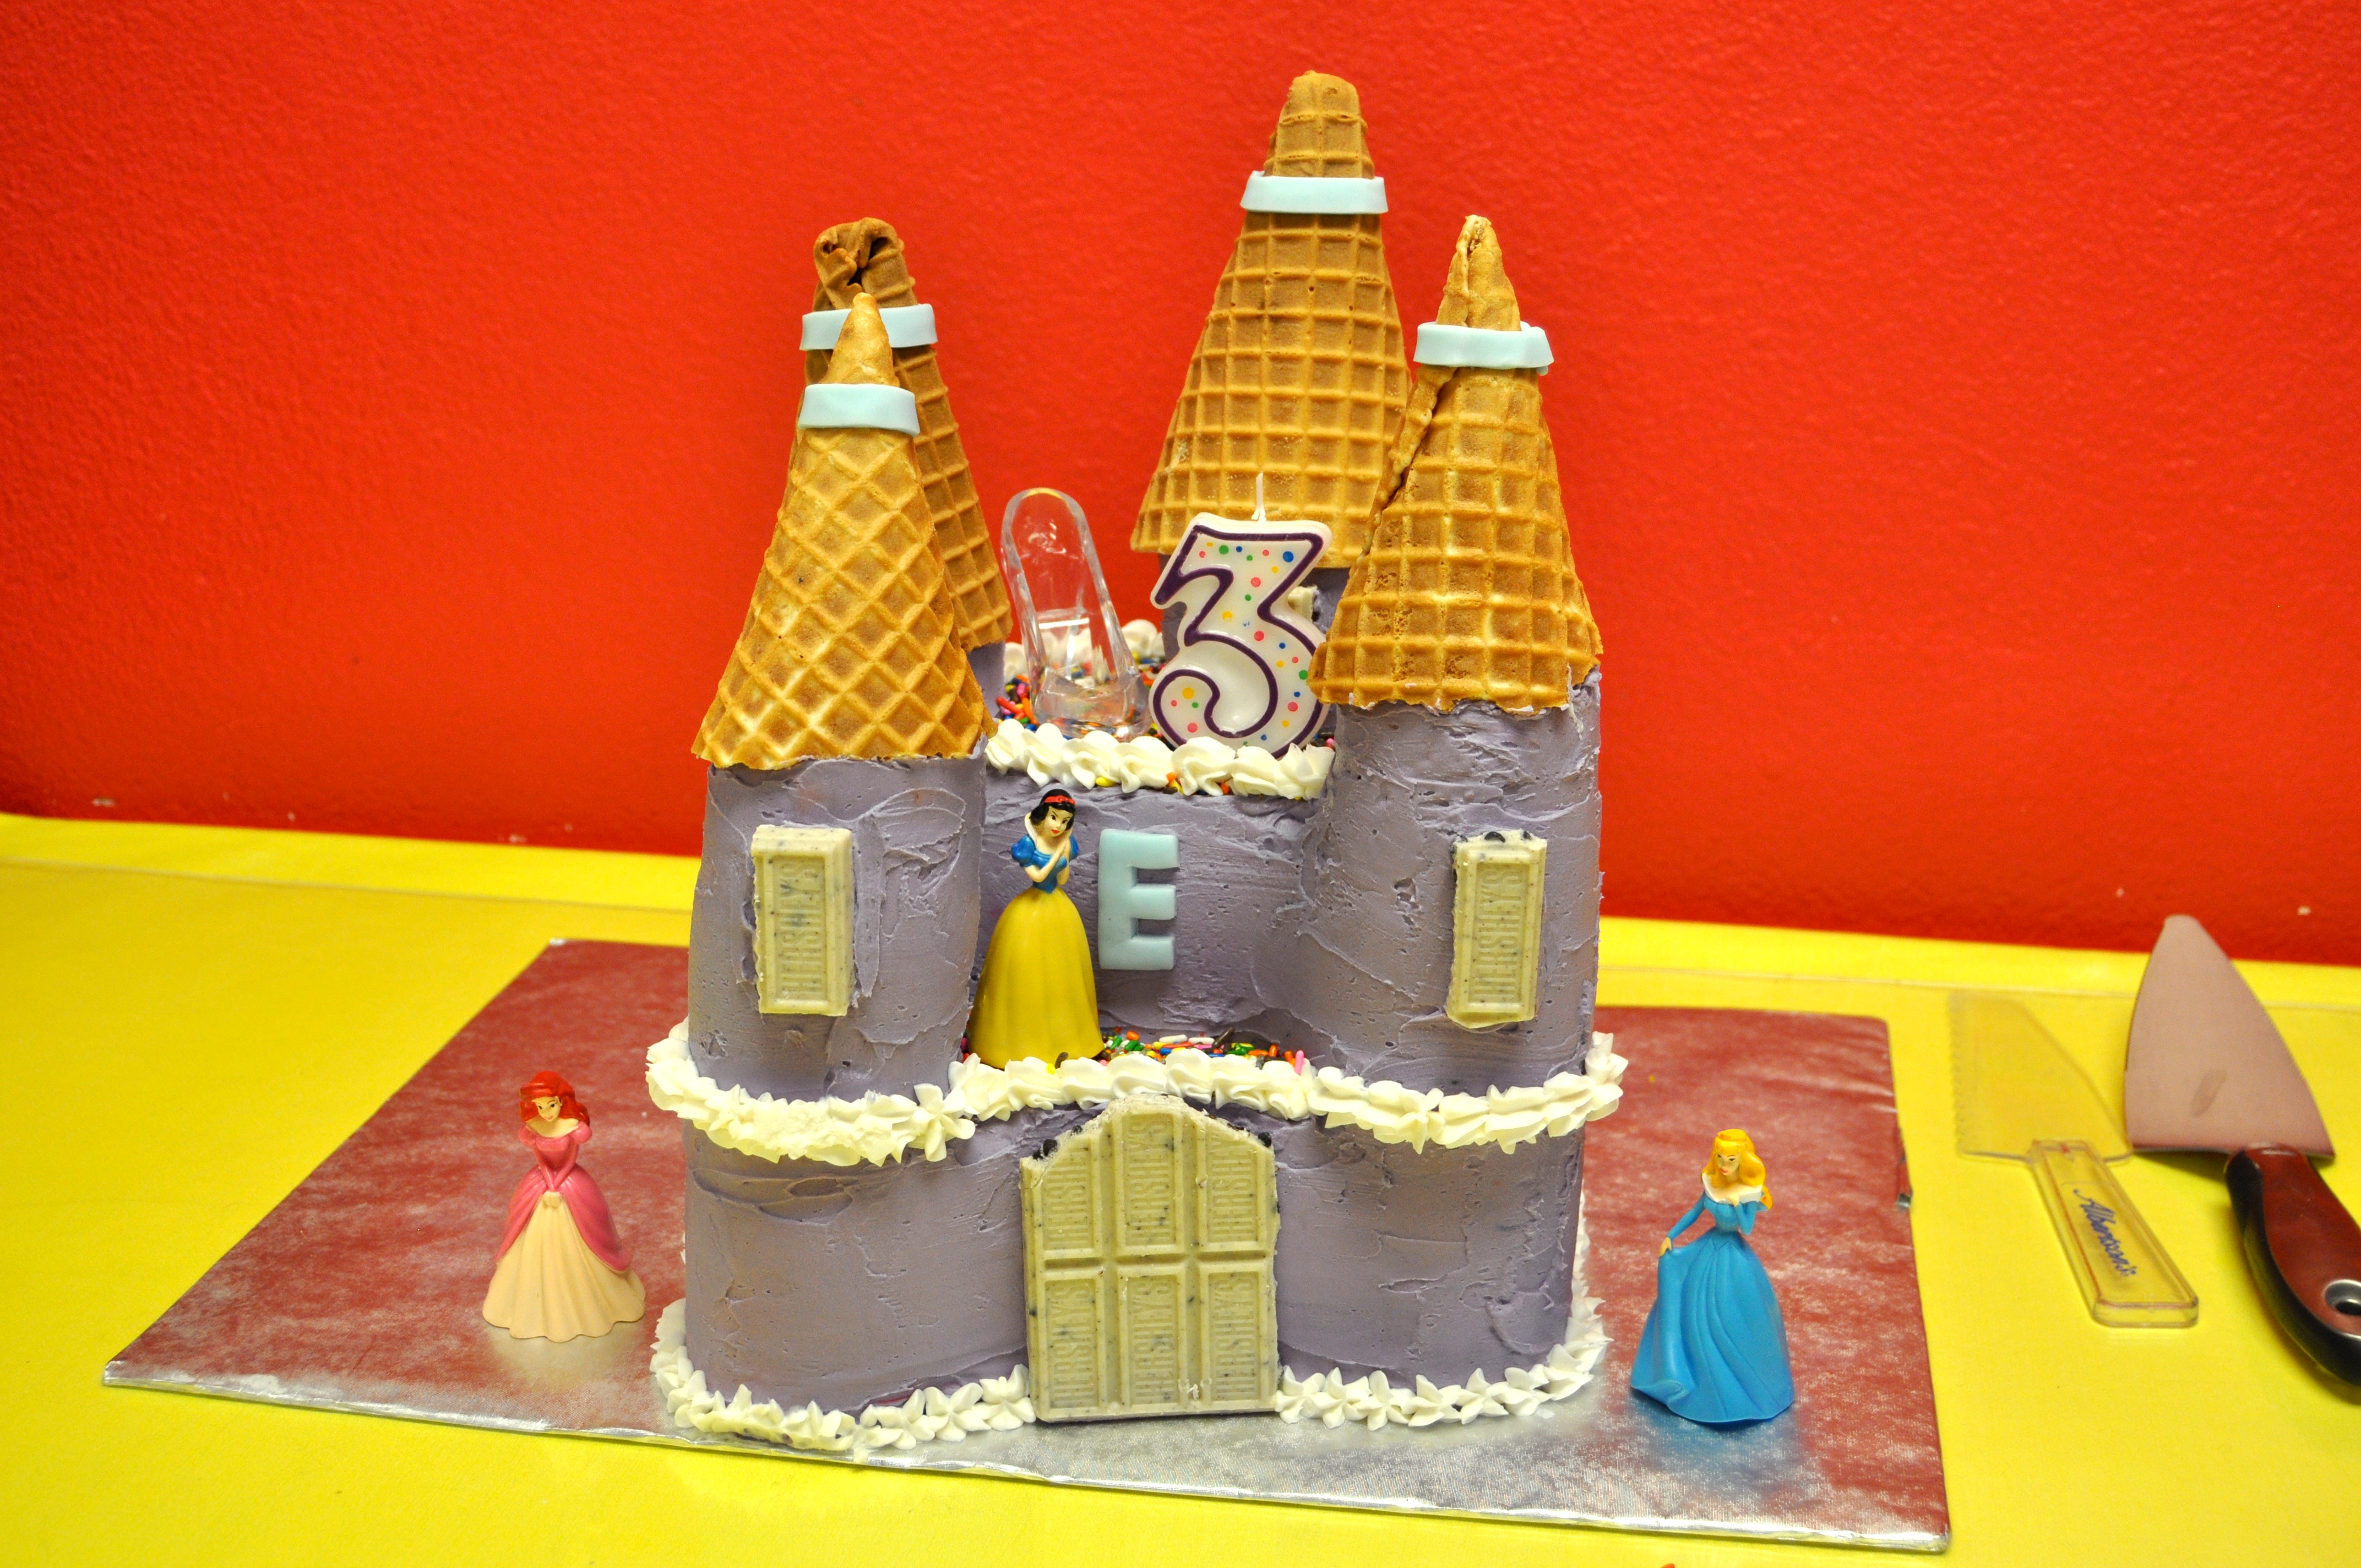
Meanwhile, I tinted the buttercream frosting. I like lavender...a completely pink castle cake would have been too much for my eyes! I took the cake out of the fridge, frosted it and put the waffle cones on top.
I got the cones from Baskin Robbins, which was just down the street from our house. But I don't think I recommend getting these because the cones were wonky - I had to carefully cut for a good fit, and the tips were not very pointy on most of them. They were 99 cents each and I didn't want to waste any more time finding other cones.
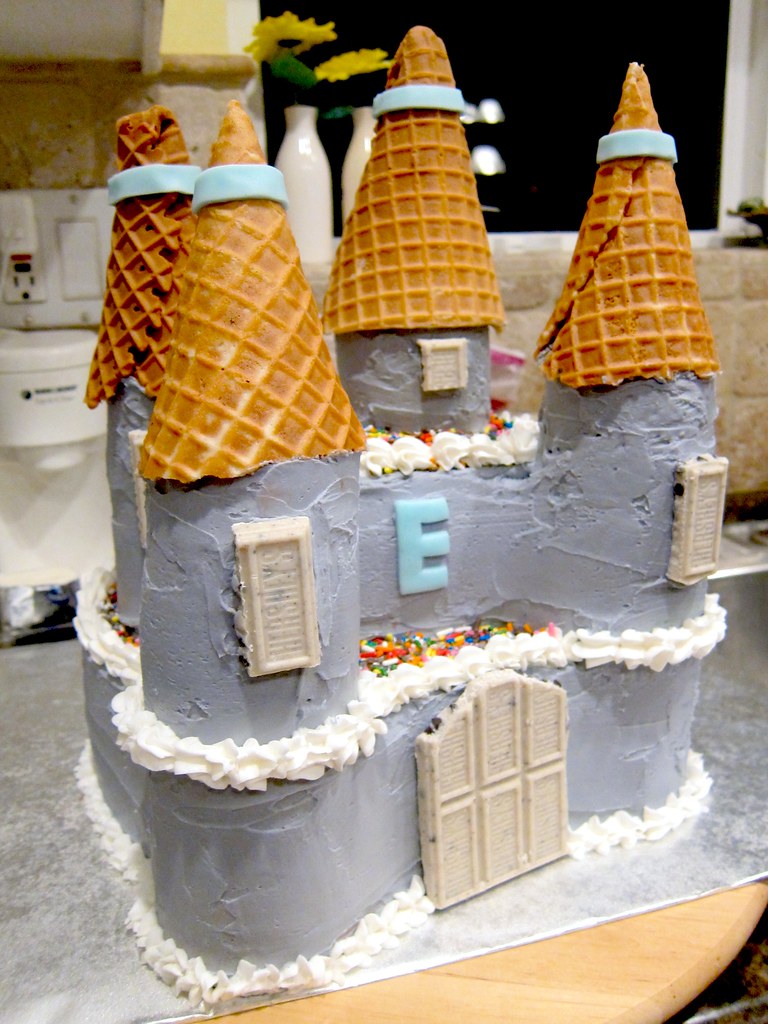
I spooned the sprinkles on each level, and used Hershey's cookies 'n cream chocolate bar for the door and windows, which were "glued" with more frosting. Then I piped the borders around:
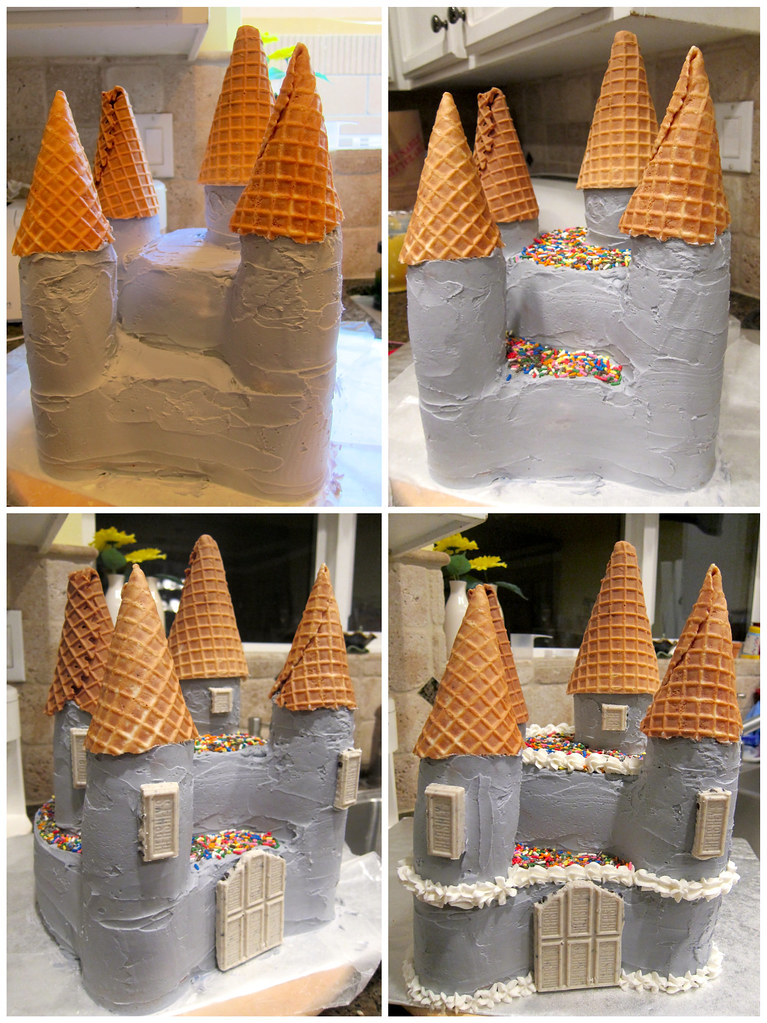
I didn't get the frosting as smooth as I wanted to, but then I finally said to myself, "It's a castle. It's not supposed to be smooth!"
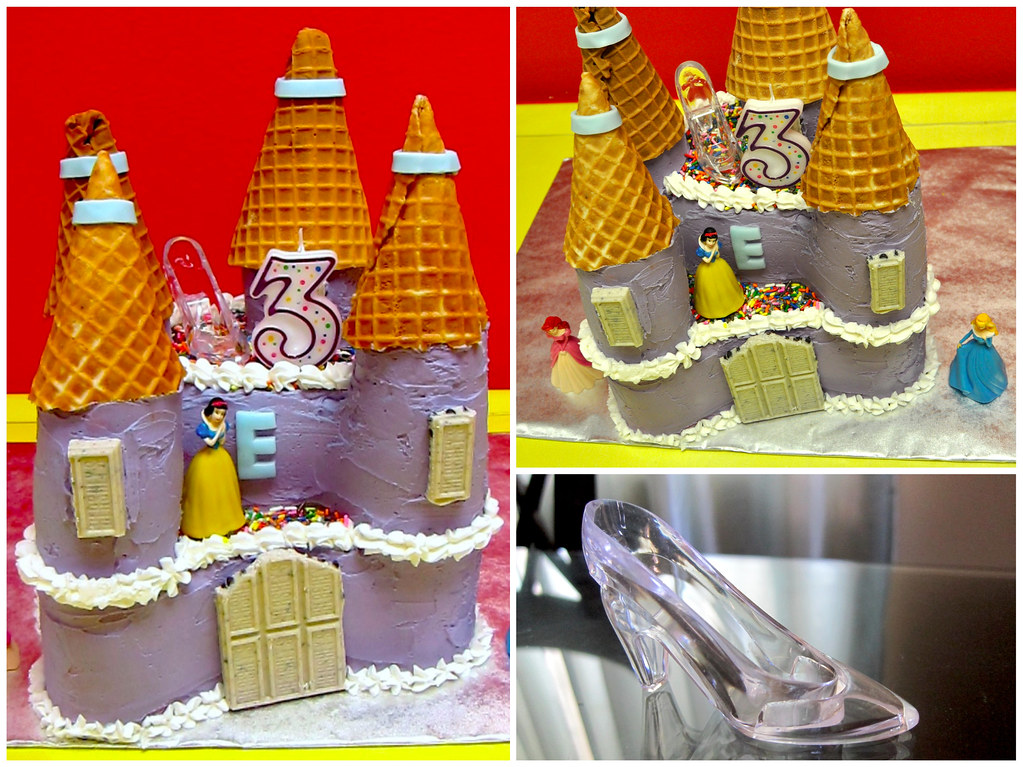
Lastly, I got light blue fondant to cut out the "E" and little strips to wrap around the tips of the turrets. I also made flags out of fondant and toothpicks, but couldn't poke a hole through the cones, so I omitted them:
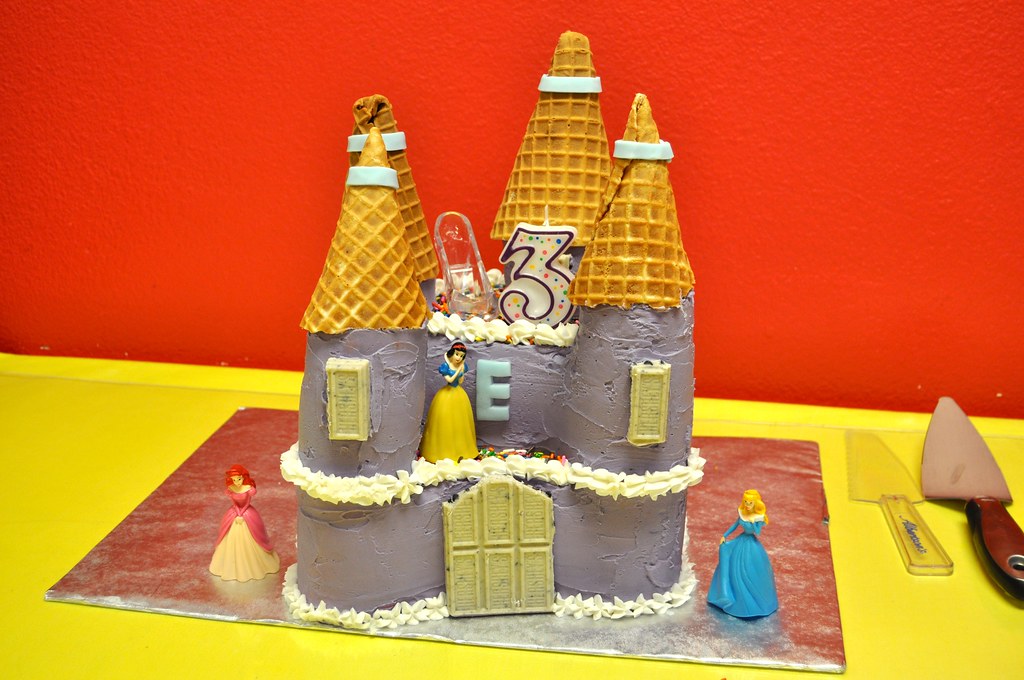
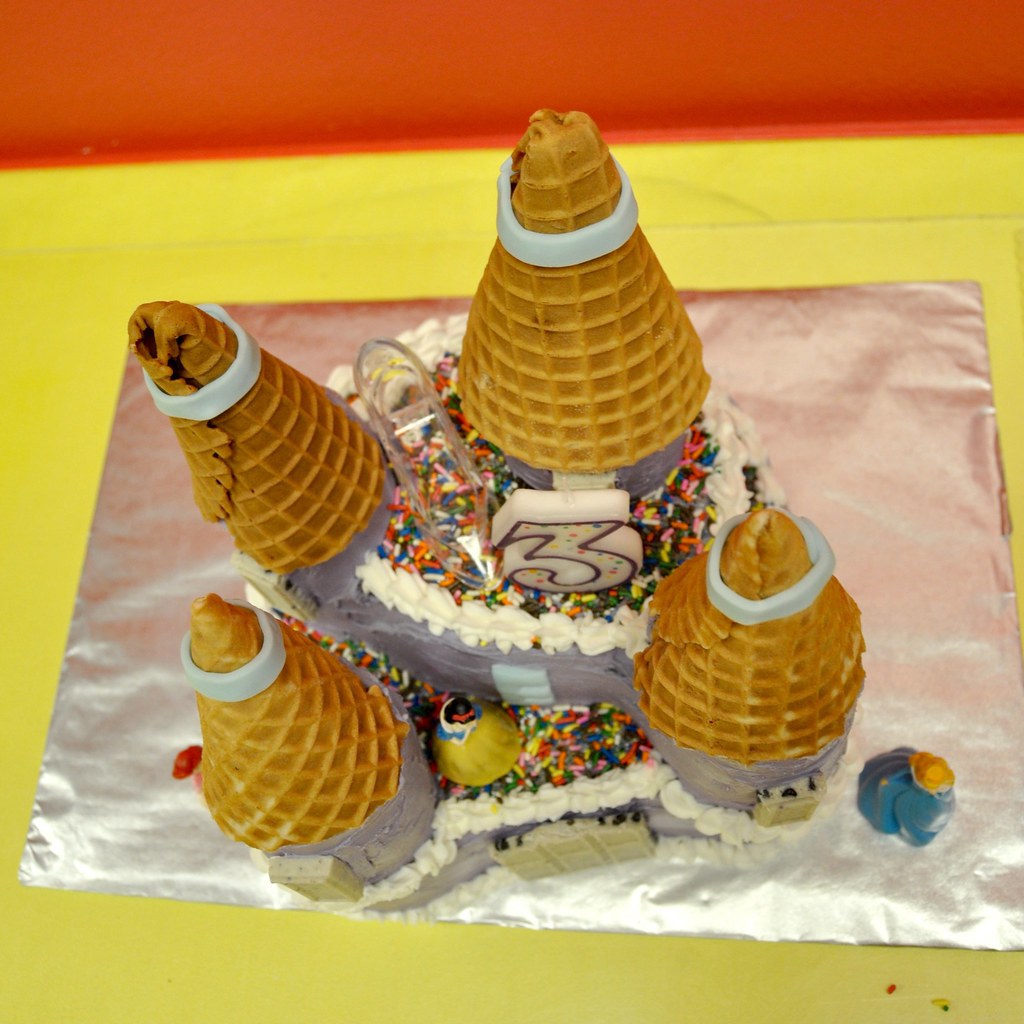
When we arrived at the party location, I topped the cake off with a candle, and Disney princess figurines that I got at the Dollar Tree. The Cinderella glass slipper was a gift from a staff at Disneyland a few weeks ago. We were in line for a ride, and the Cast Member graciously gave it to Little Boo! We were beyond excited. A friend said, "You have to put it on the cake!" and it was a great idea:
View from the top:
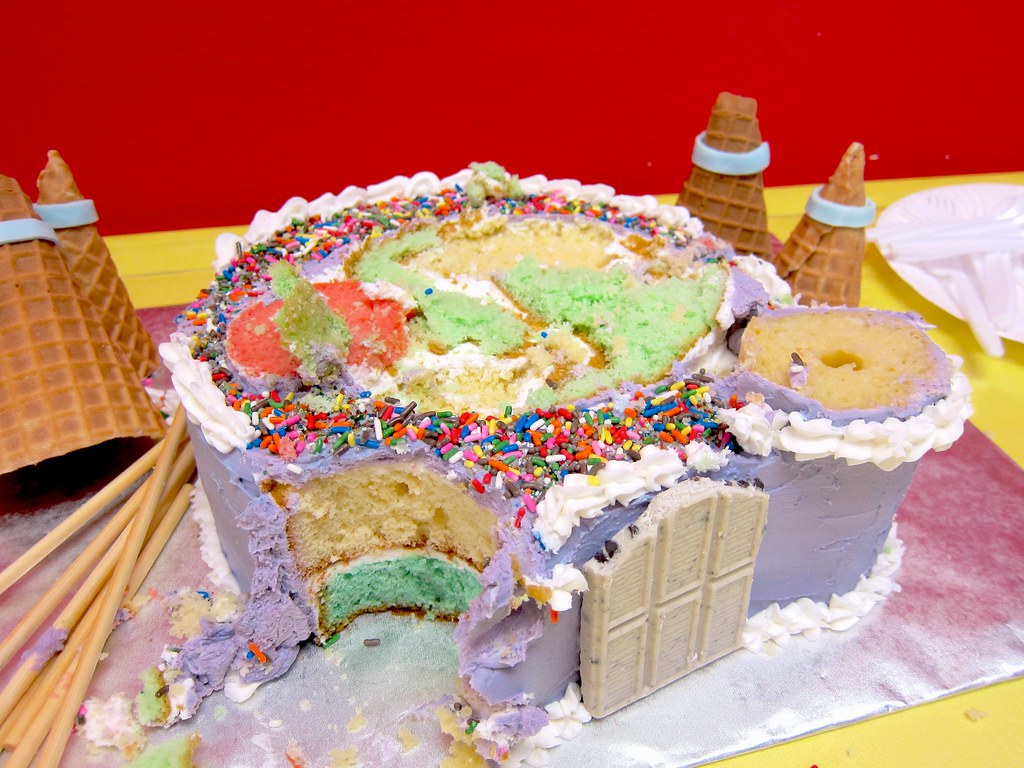
The after math:
It was really fun to make, and surprisingly didn't take long either, aside from the baking time....a double oven would have came in handy. ;)