May 25, 2011

Re-usable Snack Bags


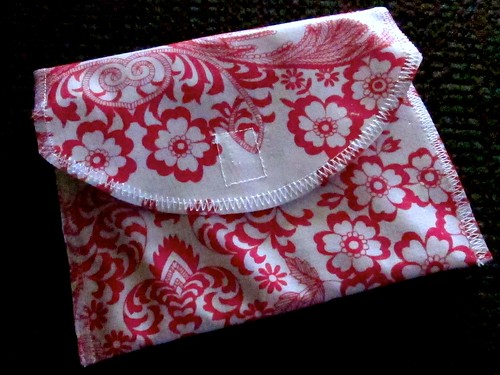
I went to my local fabric store and saw some cute oil cloth prints. I like oil cloths because they are wipeable and won't unravel. I lined the inside with the same fabric and I must say, I'm liking it! This is my first attempt, so I will post a complete tutorial when I sew the next one. I have an great idea to make regular cotton blend fabric into a wipeable material, and I hope it works!  
Because of the oil cloth fabric, it is thicker and tends to be a bit puffy...it creates air bubbles.  So be aware when sewing that some air will get trapped between the layers, as you can see in the picture below. But is still cute and very practical/functional. It also looks better in real life...these pictures don't do it justice. =)

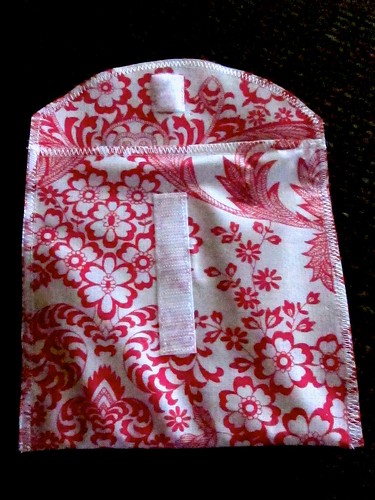
Here are the basics: You will need two piece of oil cloth measuring 7" x 16".  I took a bowl and rounded one of the shorter edge on both pieces. Pin fabric wrong sides together, so the right side faces you. Sew with a straight stitch with an increased stitch length all the way around. Sew the velcro on. Fold the shorter straight edge up to a 1 or 2 inches below the start of the rounded edge. Pin the sides and sew with a zig zag stitch. I went around it twice with upholstery thread.

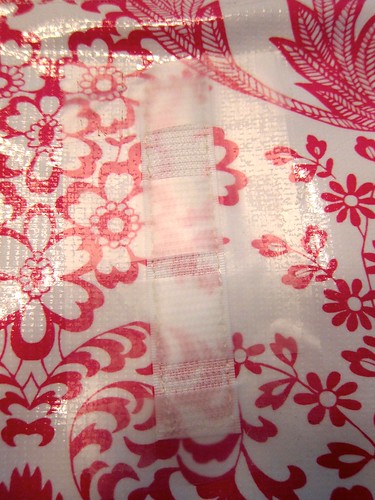
To sew the velcro on easier, I used regular Scotch tape to tape it down. After sewing it in place, simply peel the pieces of tape off:


Good luck!

May 24, 2011

Hello Kitty Cake


I am in a cake mood lately. When my friend visited me last weekend, she showed me how to do an image gel transfer. It was easier than I thought, and I think our cake turned out great. Not only was it fast and easy, it is also impressive and pretty much foolproof. I made most of the buttercream frosting as well. It was quick and simple.The lavender is the William's Sonoma's [WS] recipe and the white is Wilton's [W] recipe. The red and black are store bought Wilton's in a tube. I prefer WS's for icing in between layers and for a crumb coat because it is softer and more workable. I prefer W's for decorating because it is sifter and it will hold its shape without melting too fast.

Bake a cake, frost it when cooled, and put it in the fridge:

Find a large image online and print it out. We looked for simple coloring pages. Take a sheet of wax paper and lay it on top of the printed page. We chose not to transfer the wording, but if your image has words and/or numbers, flip the printed page over first, then layer wax paper on top. Hopefully the ink will still show through. Or you can print your image reversed. The image will reverse itself when transferred.  We tinted clear piping gel and with a number 1, 3 or 5 piping tip, pipe and trace the picture and outline everything you want to transfer onto the cake:


Take the cake out of the fridge. Quickly flip the wax paper over and carefully place it onto the cake:

With a Q-tip or chopstick, gently trace and go over the tinted gel. The image will look smashed. But don't worry:

Slowly lift the wax paper out and discard. Ta-da; the gel transferred! This is what the cake looks like:

We started by piping the insides of the image with a star tip then outlining the image with black buttercream with a round tip, but I would recommend outlining with black buttercream first:

When filling in (i.e. the red heart), start from outer parts and work your way in, making little square sections at a time so the rows will more or less line up:

For the background (i.e. the lavender), go around the image a couple times, then around the edges of cake, then fill in:

For the sides, start making rows, from bottom to top:

Then I piped a simple border around the bottom with a star tip. I built it up on the right and pull to the left:

One more picture of Hello Kitty because she's adorable:

Since this was another one of my practice cakes, I only made one layer. Still delicious though!

May 16, 2011

Rainbow Cakes


The color layers turned out so good! I used regular white cake batter and added Wilton's gel food coloring. 


I learned that the top of the cakes are significantly flatter and less dome shaped if I have the pans (filled with batter) in the oven as I preheat it:


Cutting the little top "dome" to get a flat surface. Then in half to get 2 layers per cake:

All the pretty colors:

Stacking:

The 2 cakes - make sure the bottom and top layers are the bottoms of a cake layer:

Between each layer is a some buttercream frosting:

Starting the thin layer of buttercream frosting crumb coat. I put it in the fridge to let the frosting harden a bit:

Then it was the first layer of pink frosting, then back in the fridge again:

After the second layer of pink frosting, I used a triangle cake decorating tool to make the lines:
This is what you do:


You put it on the side of the cake and swirling it around. Having a lazy susan is a definite must. I had to put more frosting on the cake than normal because the triangle tool takes it off as it makes the design:


I piped "hershey kisses" at the bottom:


And then some on top:

Seriously so pretty inside:


More cake please!:


There is the second cake. I played around with already-made fondant. It was just like play-dough:


May 13, 2011

Sewing Pants and Burp Cloths

My first attempt at toddler pajama pants! It is from a sewing pattern. And now that I know how to make them, I can't believe how easy it is. Why didn't I try sooner? =) However, I had to make some adjustment to fit my (almost) 2 year old. Her height is right at 24 months, but has a 18 month waist. So I took in 1 inch from the side. The elastic I cut was around 17 inches.

This is made from minky fabric:


This is soft flannel:


Such cute fabric but I cut it wrong! Do you see how the frogs are upside down on the right, and right side up on the left? Haha. Note to self - avoid fabrics with straight lines and/or specific pattens. ;)


For my friends baby shower, I got her a gift card wrapped in these two burp cloths I made:


I forgot to iron them before taking these pictures:


But I had made these first. I think they are ok, but I am not loving them like the ones above. They remind me of sham pillow cases. So I didn't include them in the baby shower gift: