Showing posts with label Decor. Show all posts

March 19, 2015

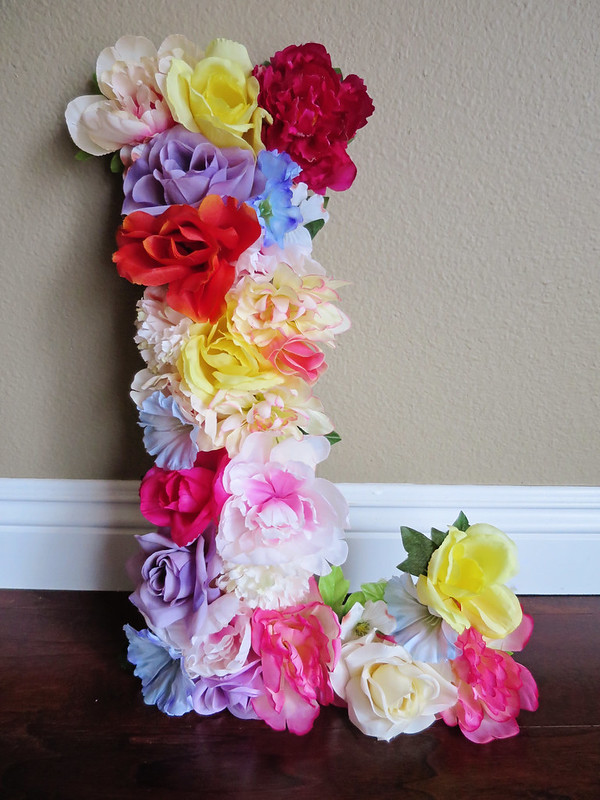
Floral Letter

I love this so much!
IMG_6121

This is a great decor piece for every room and every event! It is super simple to do, and looks lovely and impressive. I chose to use all sorts of colors, but it would also be beautiful using a solid color for the entire letter.

Materials:

Wooden Letter
Flowers
Hot Glue
Wire Cutter
Scissors


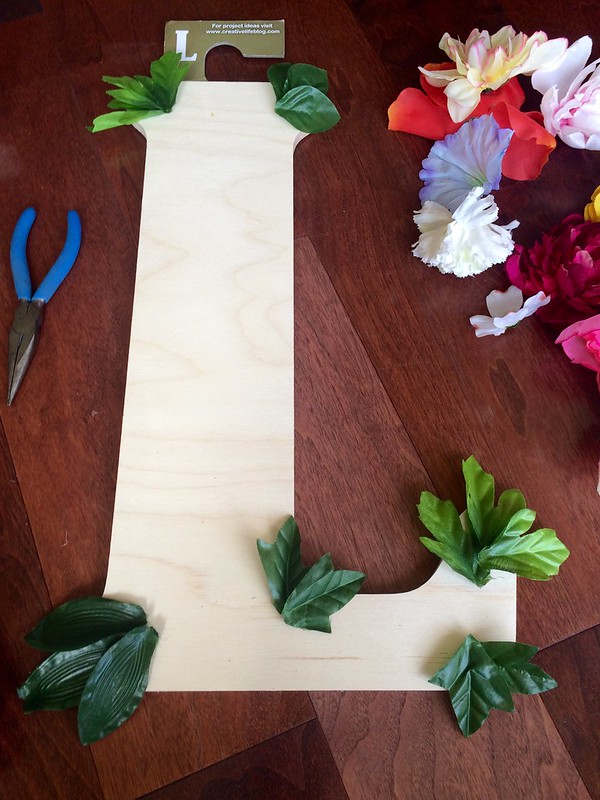
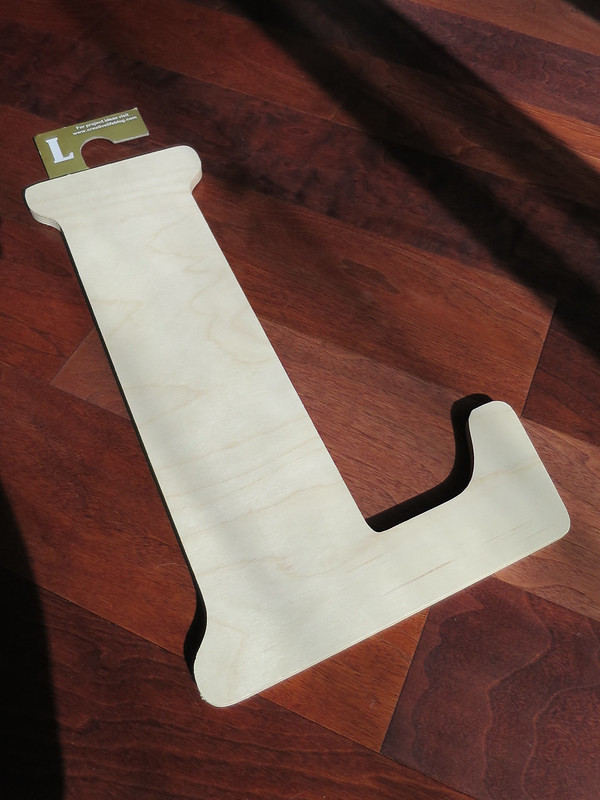
I picked this 18" wooden letter from Hobby Lobby. With a coupon, it was $7.79 plus tax:
IMG_6116

I got a bunch of flowers from the Dollar Tree. I ended up not needing so much, but I wanted an assortment of colors and different kinds of flowers:
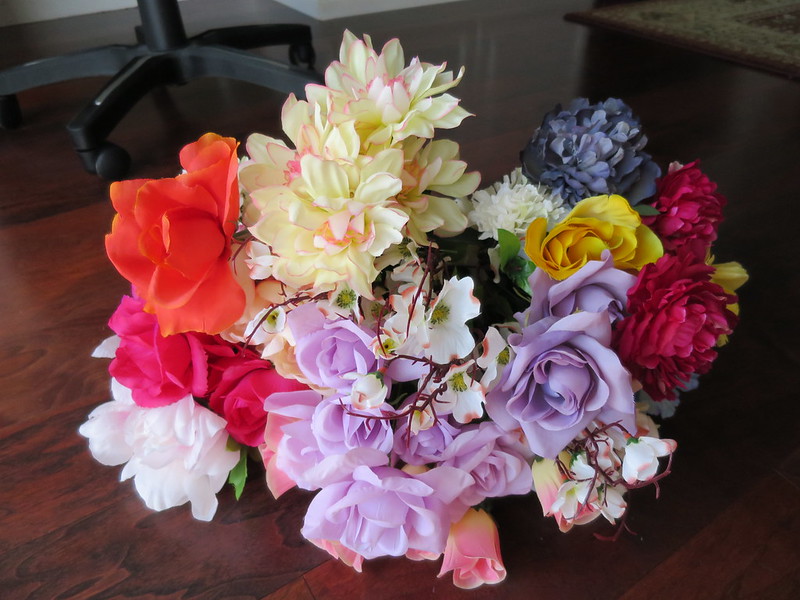
IMG_6117

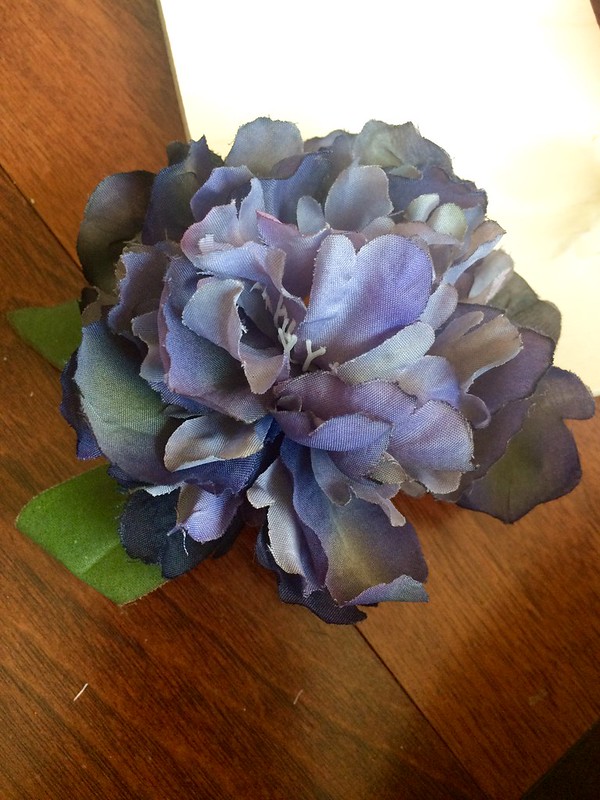
Step 1: Cut off the flowers from stems. Get as close to the base of the flower as possible. The flatter the base, the better for the glue to adhere to the letter. If the flower comes apart, it's ok because you'll be hot gluing it down anyways:
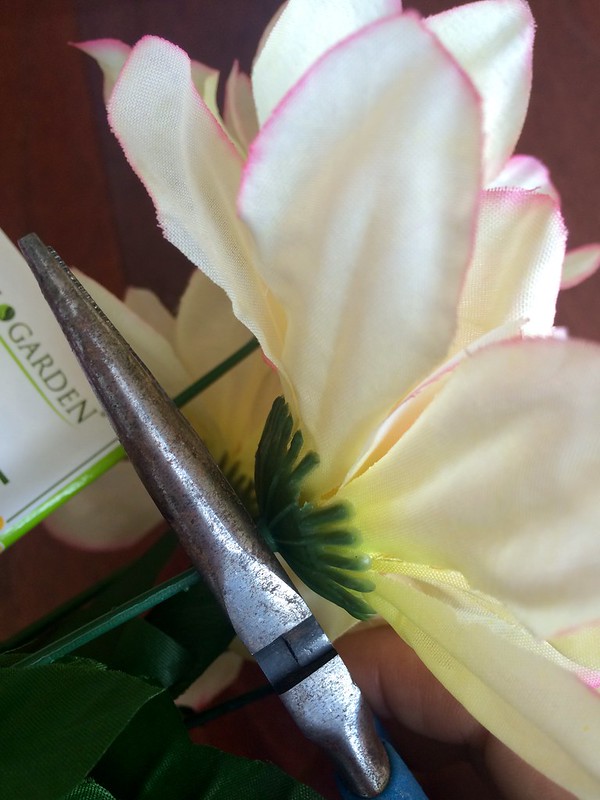
Untitled

Some of my flower had these long green things...cut those of too:
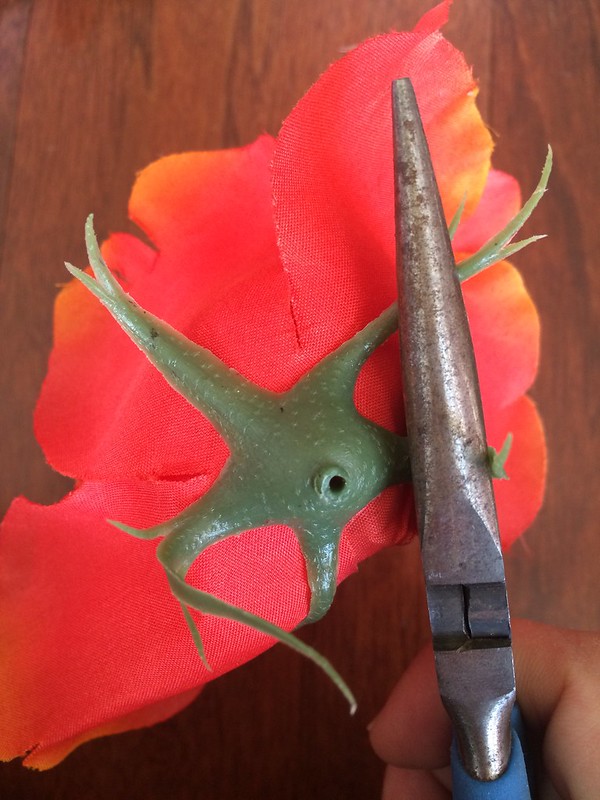
Untitled

Step 2: Cut and prep the leaves. Just pull the leaves off the stems, and cut them into individual leaves:
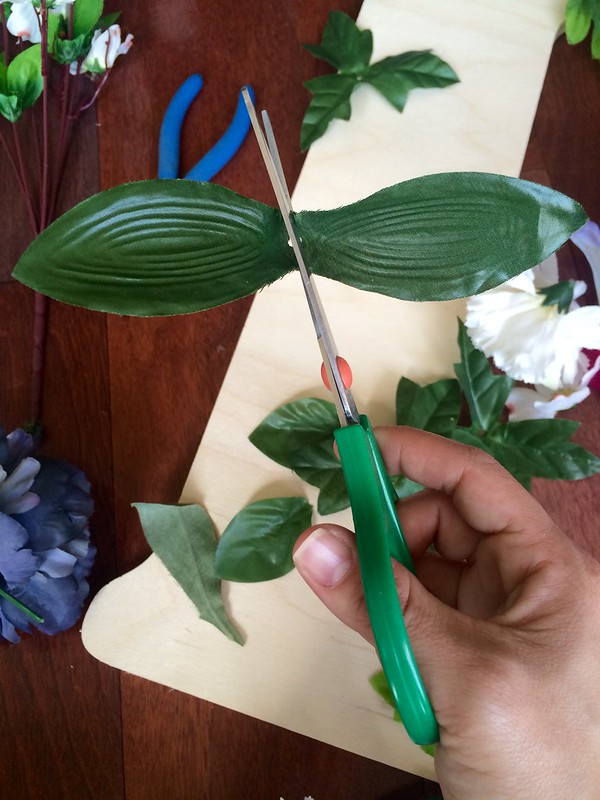
Untitled

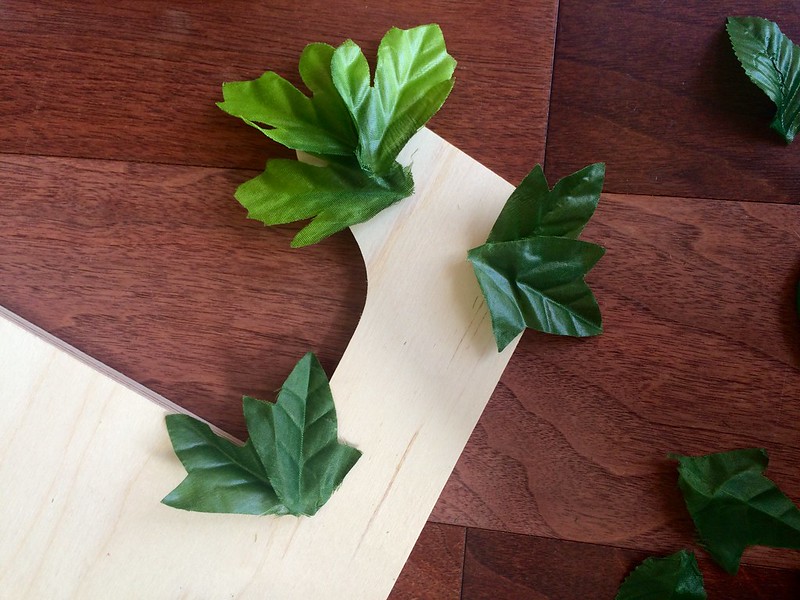
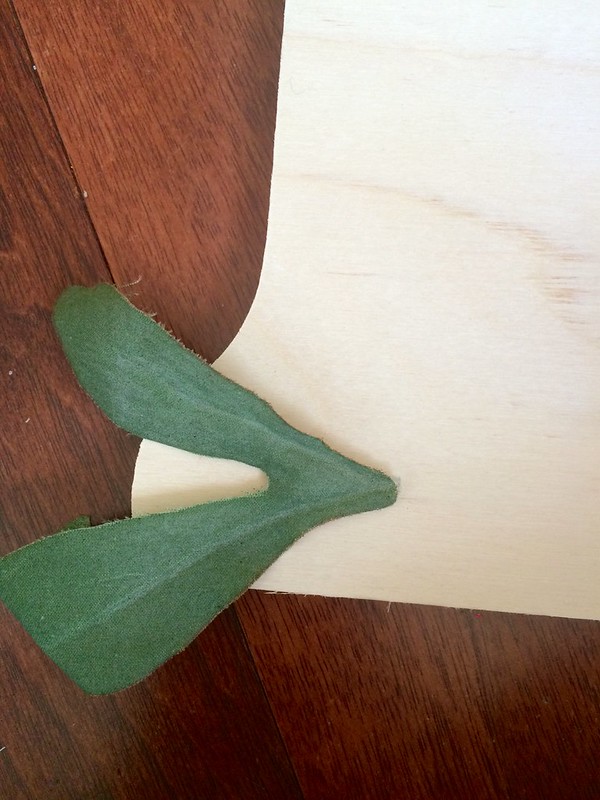
Step 3: We are going to cover the corners with the leaves:
Untitled

It will give dimension to the letter, and help make the flowers look lush as if they are falling off:
Untitled

Untitled

Untitled

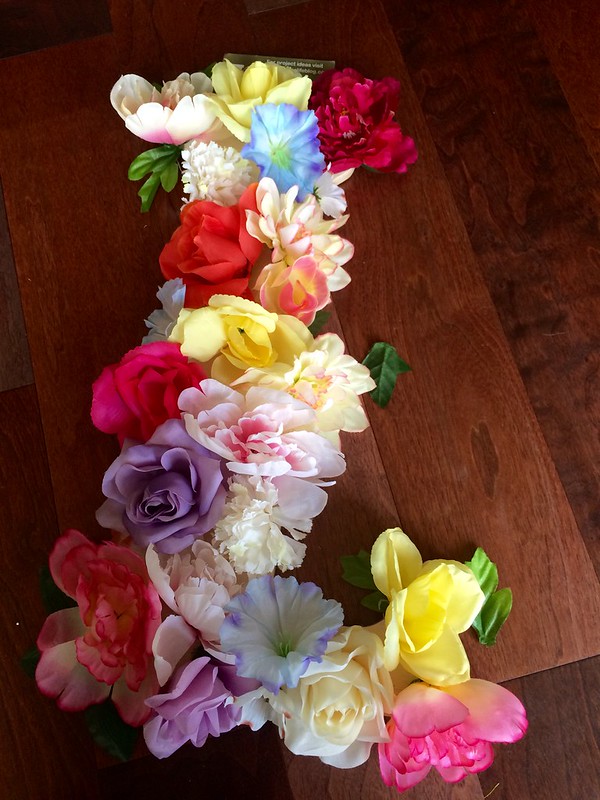
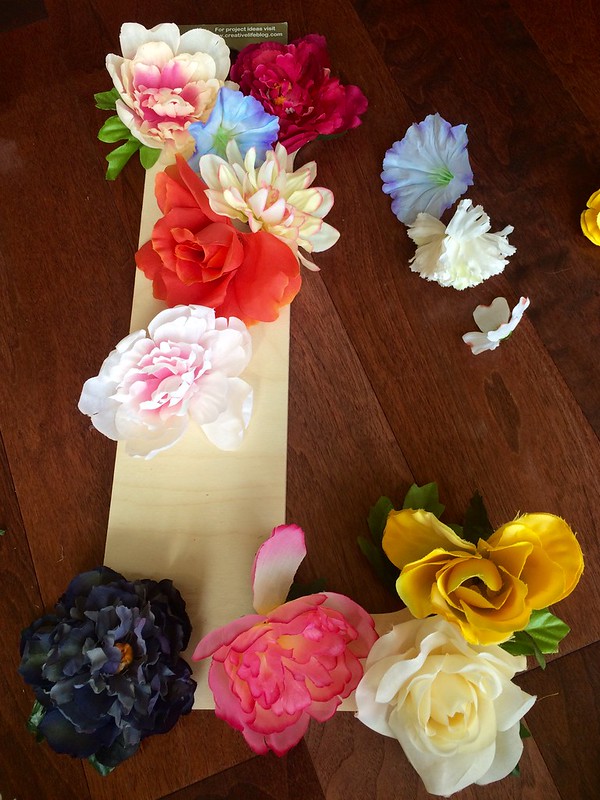
Step 4: Arrangement the flowers but don't hot glue yet!
Untitled

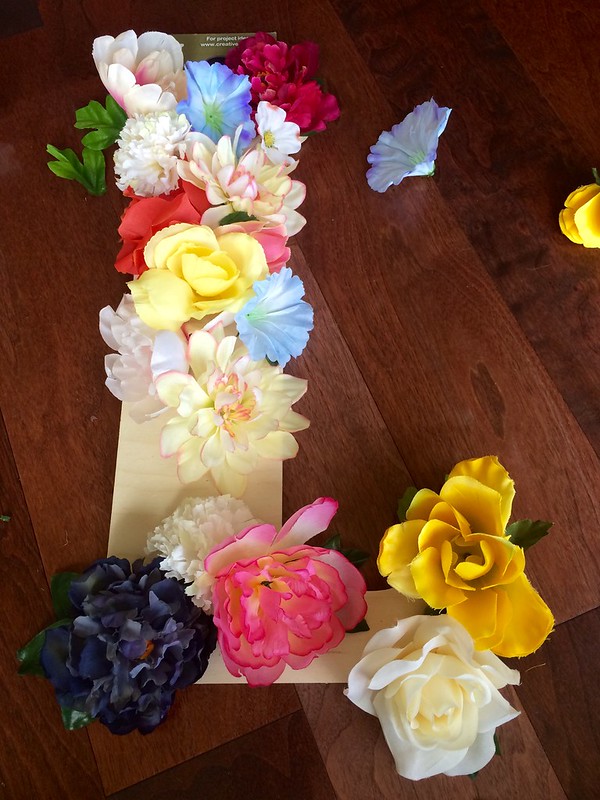
Get it exactly how you want it, and you might even need extra flowers later:
Untitled

Untitled

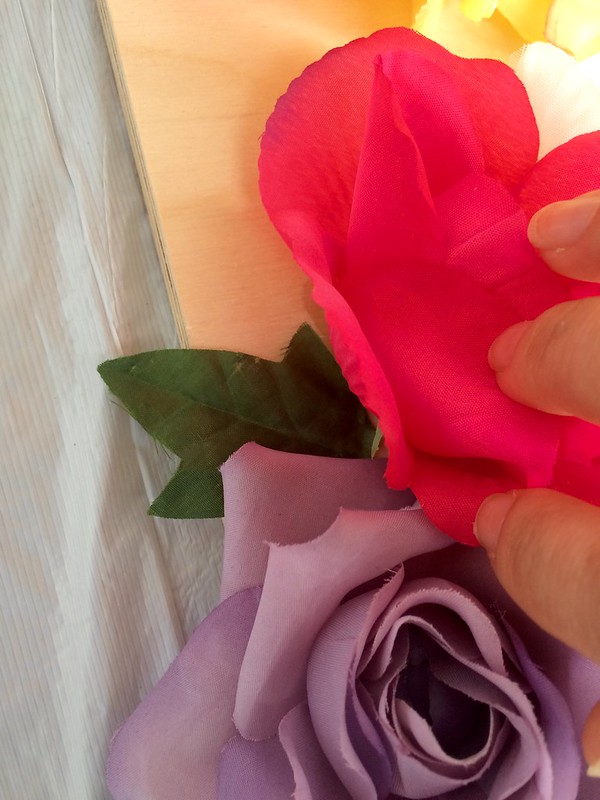
Step 5: Once you have the flowers how you want it, take a photo of it.  You'll be taking the flowers off and gluing them back on one at a time, so you will want that photo as a guide. Start by gluing the leaves and flowers at corners of the letter first. Then start filling in. Every so often, glue a leaf behind or in between flowers. There is no right or wrong...just keep gluing!
Untitled

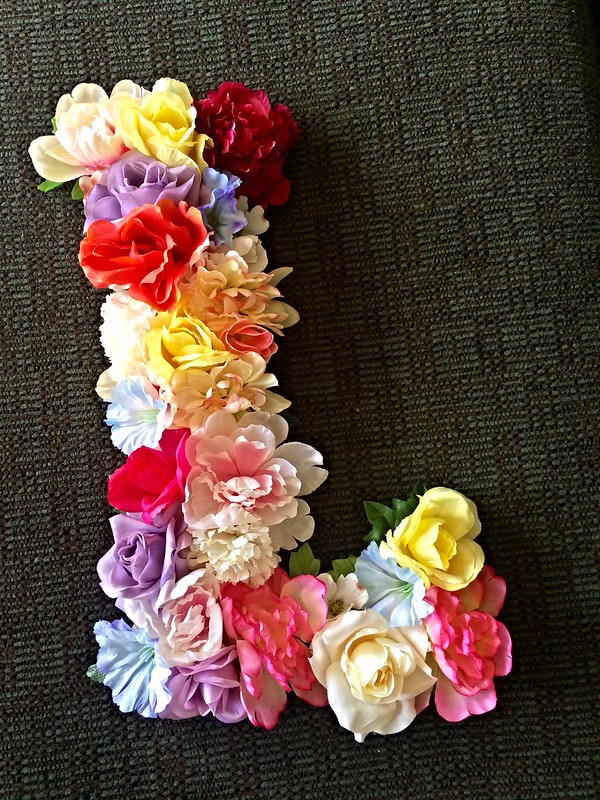
Step 6: Every so often, take a step back and look at your progress.  If there are any gaps, fill them in with more flowers or leaves:
Untitled

It's all done and looking gorgeous. It's ready to be hung on the wall or propped on a shelf.
Good luck!
=)

December 04, 2013

PBK Christmas Tree Advent Calendar Knock Off

IMG_1970

I have been eyeing the Pottery Barn Kids Christmas Tree Advent Calendar for a while. I never did purchase one. Recently, when a friend mentioned that she's going to make one, I happily joined her for the ride! This is the stock photo:

Untitled   Untitled

I can't believe we did it! We are so happy with the results. =)

Materials:

2 yards of premium green felt
1 brown felt sheet for the trunk
2 yellow felt sheets for the star
An assortment of colored felt for the pockets and designs
Embroidery threads
An assortment of embellishments (ribbons, little bells, mini pom poms, etc.)
Needles
1 keyring
Iron on backing

First, we calculated and drew the tree on a big roll of paper. The tree is 35" x 61" including the star and the trunk. Each pocket is 3" x 3.5".  Then we sketched the pocket designs. We came up with a few different versions for some of them. It was hard to decide what we liked best!


Untitled

Some designs and colors were changed from the original sketches. We made copies of them, then cut the shapes out to use as templates:
Untitled

All 25 pockets finished!
IMG_1966

Iron on the backing and cut them out. This will protect the backs and give them more sturdiness:
IMG_1969

We cut the tree out (2x - one front, one back). Set one tree aside. My friend embroidered all the numbers and snowflakes on the remaining tree. Then it was time to pin the pockets on!

Untitled

We used a blanket stitch with a thicker thread to sew the 3 sides of each pocket:

Untitled

We cut out the trunk and pinned in between the two tree layers. Then top stitched the entire tree. We cut out the star (2x - one front, one back). Top stitch the two star layers together. We cut out a little strip of green felt and looped the keyring in, for hanging. Pin the green strip behind the tree top, and pin the star on top of the tree in front (so the green strip is hidden):
  
Untitled

Close ups:
IMG_1971

IMG_1972

IMG_1973

IMG_1974

IMG_1975

Voila! We love it.
IMG_1970

October 30, 2013

Easy DIY Halloween Pumpkin Garland

Untitled

This is so easy and simple! If I can do this, anyone can.

I came across a packet of shimmery pumpkin cutouts at the Dollar Tree. I knew it would be perfect for a last minute Halloween garland. I also had some jute left over from my Jute Wrapped Letter project. I thought of hot gluing the pumpkins onto the jute, but that sounds like a hot mess. So, I decided to just Scotch tape them on!  


Materials:
String/rope/jute
Tape
Pumpkin cutouts from Dollar Tree

Untitled

Untitled

Measure and cut your jute. Then tie a knot on the ends:
Untitled

Find the center of the jute, and stick a pumpkin on with a small piece of tape.  I just had the tape go up and over the jute:

Untitled

I spaced the pumpkins out to every 8 inches. Done!
Untitled

Good luck!

October 17, 2013

Planting Succulents

I wanted to give planting succulents a try. With the help from a friend, I made a pretty arrangement!

Each pot was about $2, with the one in the terra cotta pot being $3.50. They were from Lowe's and Home Depot:

Untitled

I was able to separate some plants, so one little pot gave me 3 or 4 little ones:

IMG_1097

I planted away. My friend gave me some tips and suggestions on how to make it look better, such as the height and color placements. Then we added green dry moss over the soil as a filler, giving it a finished look. Ta da, don't you love it?

Untitled

I put my creation on my dining table, where it looked excellent for 2 weeks. I watered it once. Then all of a sudden...I started seeing little flies, and some plants were not looking so great. I immediately texted my friend, and she said it is probably fungus gnats. Wah! My hard work going down the drain! I took the whole thing outside to dry out under the sun, and it got better. But a few plants were at the point of no return. So I decided to replant it. The next day, I went back to Home Depot and got some replacements:

Untitled

This time around, I put some rocks at the bottom of the platter first, then the cactus soil. I also realized that my dining table gets zero sunlight, which succulents need at least 4 hours a day. Also, I learned that the darker, greener succulents are more hardy, and are able to survive my brown thumb. The waxier, plastic plant types are far better off and more kind to me than the softer, fuzzier succulents.

This will stay outside, and I hope this time, everything will stay alive:
Untitled

Good luck!
=)

Funkins, Craft Pumpkins

I discovered craft pumpkins a few years ago when I wanted to keep my pumpkin carving creations forever. They look like the real thing. I use the same tools and carve them exactly how I would with real pumpkins. Joann's sells Funkins, and Michael's sells craft pumpkins. I actually haven't checked Hobby Lobby, but I'm sure they sell them too.

There are a couple differences between the two. First, the price factor - Funkins are more expensive. Second - Funkins have a hole at the bottom of it already cut out (to stick a battery operated light or candle in). Michael's craft pumpkins do not, so I carved one out. Third - both craft pumpkins are already hollow, but the inside of Funkins are orange, and the inside of Michael's craft pumpkins are an off-white/yellowish color.  They are made of low–density polyurethane foam, and it gets messy with all the little pieces flying off as you carve.

In the end, those differences do not have a great impact on the results, especially in the dark.  I got two craft pumpkins from Michael's, and went to work.

Boo requested Princess Tiana and Ariel. I Googled photos for inspiration and found the perfect ones of 1) Tiana and the frog kissing and 2) Ariel on a rock. I printed them out to size, and used them as my templates:


Tiana


Ariel


Now that I have a few carving experiences under my belt, I know to carve out the small details first, then move on to the bigger pieces to avoid cracking and breakage. I am so excited to show you my "carvations"!


Here, I just cut out Tiana. Then I'll start to fine tune and smooth the lines:


Untitled


IMG_1193


IMG_1188


IMG_1185


Pretty cool, right? =)


Untitled

Good luck!
=)

Jute Wrapped Letter

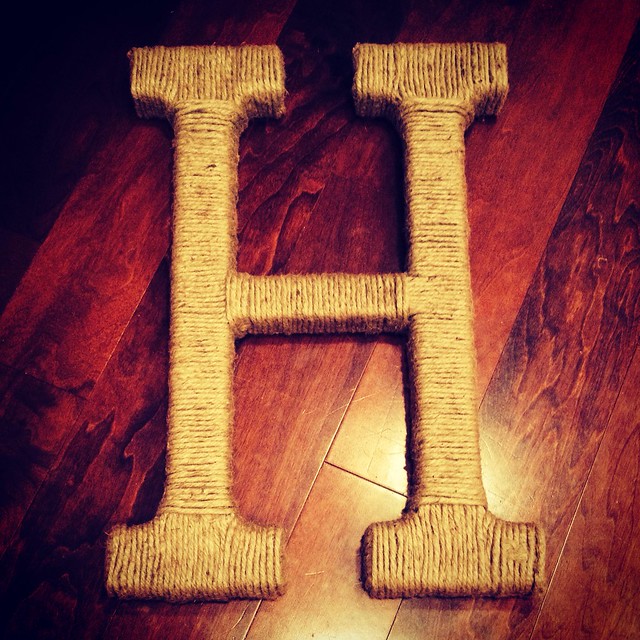
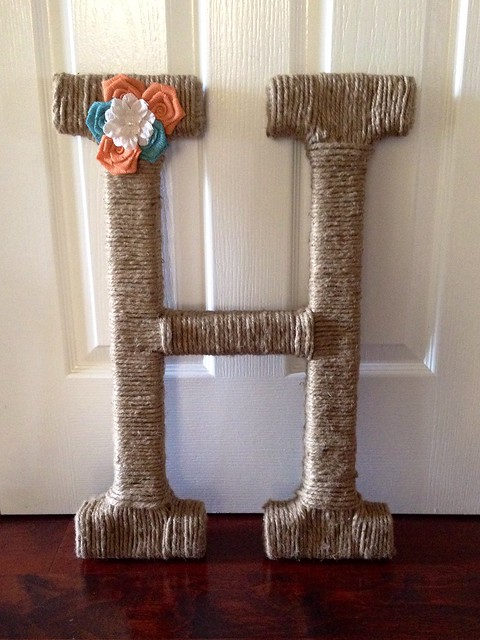
A while back, my sister in law made a jute wrapped letter "R" to hang on her front door. It turned out so cute, and she kindly sent some supplies my way so I could make my own letter! The materials were all from Amazon, click for the links.

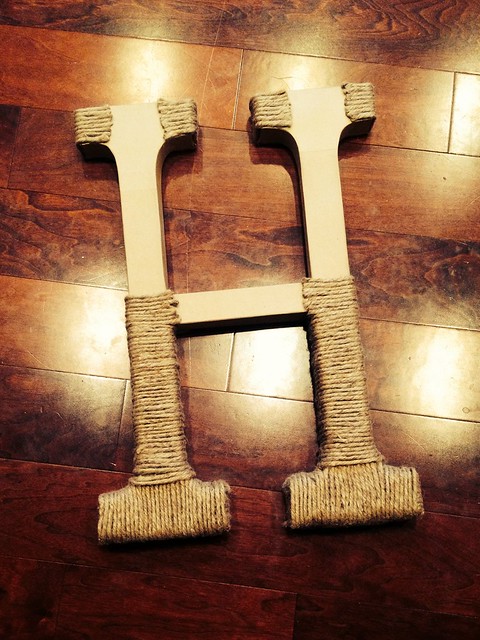
Letter H
Jute - Ordered 2 rolls, and used 1.5 rolls
Burlap Flowers - Here, Here and Here

I already had hot glue and sewing pins on hand.

I didn't take step by step pictures, but it was pretty easily to figure out. I cut and hot glued pieces of jute on the sides. Then I wrapped it around and around, hot gluing on the intersections:


These burlap flowers are so cute. I thought I could change up the color of the flowers depending on the season, so I didn't want to permanently hot glue them on. I decided to use these little sewing pins I have, and just poked them in. The pin heads just so happen to be the similar to the colors of the flowers!


And done!


Now I just need to figure out how to hang it. I can't decide whether I want to hang it with ribbon or jute. Decisions, decisions...

Good luck!
=)