Showing posts with label Beauty. Show all posts

October 23, 2013

Halloween Nail Art

Halloween is coming up fast! It's time to get into the spirit:

Untitled

After putting on a clear base coat, I did two layers of each base color -
A nude for the stitches
A white for the mummy
A gray for the ghost
A green for the spider web
A white for the candy corn
Untitled

For the candy corn -  I made an orange stripe across the middle of the nail, then a yellow stripe at the tip:
Untitled
For the spider web - I used this bottle that came with a very fine, thin, tipped brush. I drew 4 straight lines coming out from one corner. Then 2 curved lines:
Untitled
For the ghost - I put a coat of glitter and then top coated it. With a white polish, I made a tear drop shape with the tip curving to the side at the bottom of my nail. This is the body of the ghost. Then I made a little dash on either side of the ghost body for hands. Lastly, I used the black with the thin brush to make 3 dots for the face:
Untitled
For the mummy - With the black thin brush, I drew and fill in between the lines like so. With the white polish, I made 2 dots where I had filled in with the black. Then I made 2 smaller dots in black, on top of the larger white dots:
Untitled
For the stitches: I made an orange stripe at the tip. Then I drew a black line all the way across the nail where the orange and nude met. Then I drew short little black lines vertically like so:
Untitled
Remember to wait a minute or two after each layer! I put on a thick layer of top coat and drying drops. Then cleaned up the edges.  All done!
Untitled

Boo wanted Halloween nails too! I used a dotting tool here. If you don't have one, you can use a bobby pin or a straight pin.

Untitled

Good luck and hope you all have a spooktacular night!
=)

July 21, 2012

Strawberry Nails

I have been on a little nail art kick lately. 
I saw Strawberry Nails on Pinterest, and decided to give it a try.
I love the results. So summery and fun!


What you will need:

Pinkish red nail polish
Scotch tape
Pinking shears
Green nail polish
Toothpick
White or black nail polish
Top coat clear nail polish

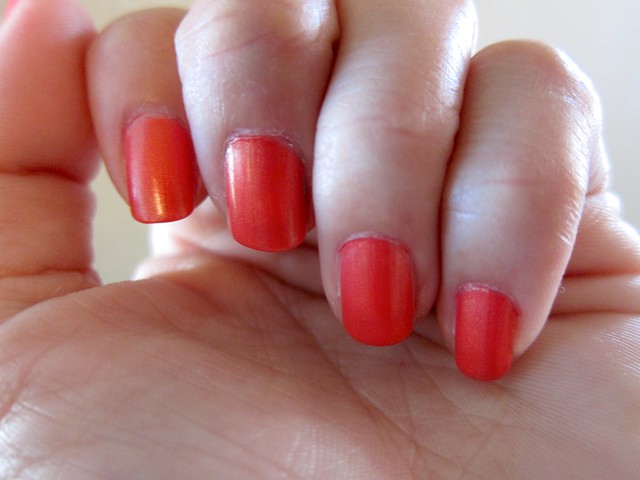
1. Start with reddish pink nails:

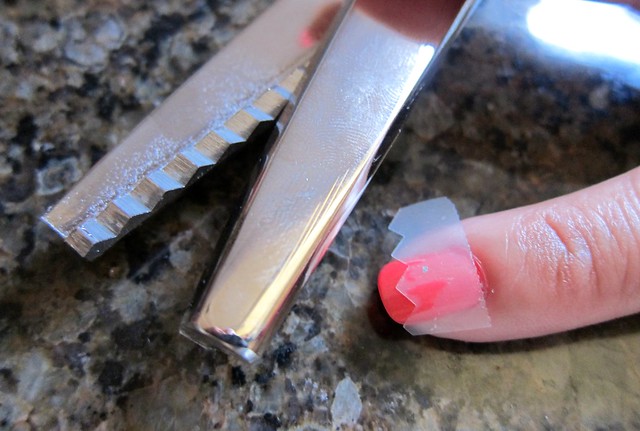
2. Use pinking shears to cut of a short piece of Scotch tape and adhere to your nail:

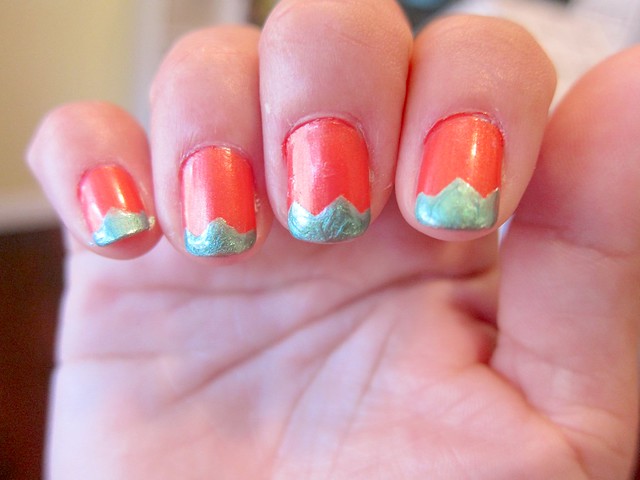
3. Paint the tips of the nail with a generous coat of green polish and immediately remove the tape:

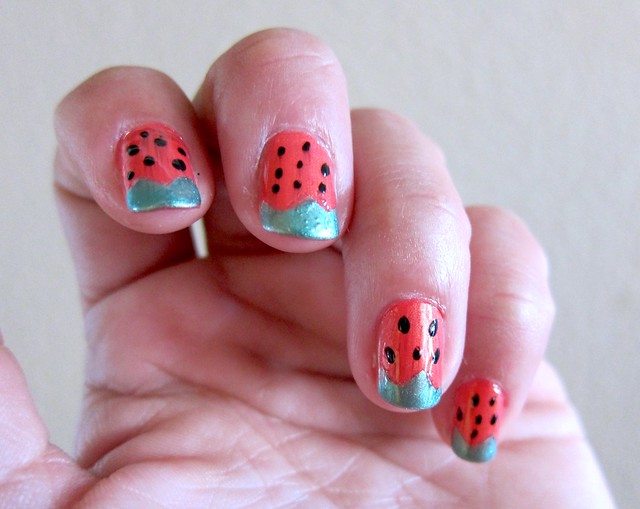
4. With a toothpick, angle and dip it into white or black nail polish and dot onto the pinkish red part of the nail. These will be the "strawberry seeds":


5. Finish with a top coat and you're done!

I find that the white nail polish looks more like strawberries, and the black makes them look like watermelons. Either way, I really like them.

What are your thoughts? =)

December 08, 2011

Chain and Ribbon Jewelry

This is probably the easiest and simplest project I have done in a very long time!
The result is beautiful, and everyone will be impressed. =)

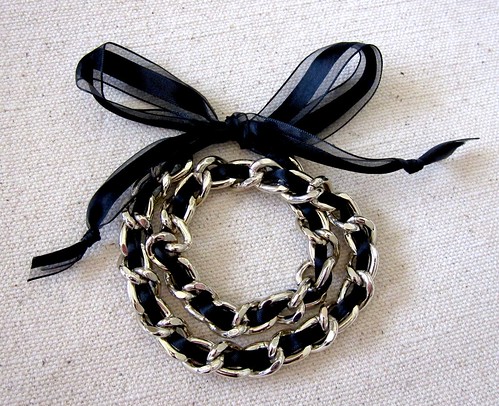
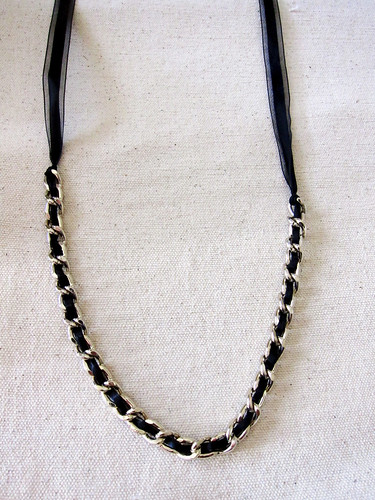
It can be a necklace or bracelet:

Wrap 2 or 3 times around the wrist:

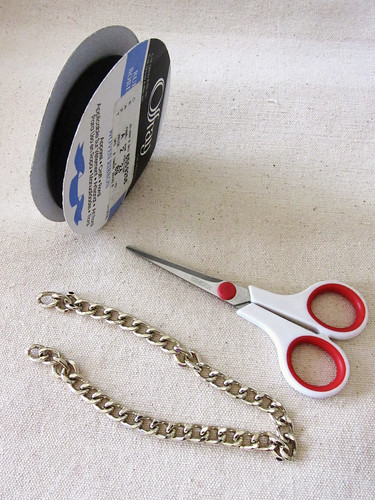
Materials:

Chain - You can get it at Lowe's or Home Depot, or even a small dog leash chain would do. You will need pliers if you have to shorten the lenght.

Ribbon - I used a 5/8" width but next time I'll use a "fatter" ribbon

Scissors

To prevent the ribbon from fraying, there are two options: 
Using a lighter or using clear nail polish. 
But before you do the "heat and seal" method with a lighter, make sure the ribbon is made of synthetic material like polyester, which will melt at the ends when heated. Ribbon made of silk or cotton will just burn, so you will need to use the clear nail polish method instead, by just dapping it on the ends. 

Let's get started! 
With one end of the ribbon, and singe it with a lighter, or use a stove like I did because I couldn't find a lighter in the house. The ribbon doesn't have to touch the fire....just get it close enough and it will melt. It only take a few seconds and it goes fast:


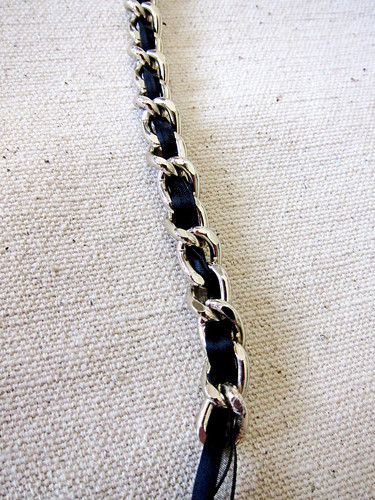
Take the singe end and weave it through the links. I weaved it through each link, back and forth, but you can do every other link to create a different design:


When you get to the end, pull approximately 8 inches of the ribbon through (however long you prefer. Keep in mind you need enough to tie a bow). Then tie a knot at the end of the chain by weaving it through the last link:


Pull the same amount of ribbon on the other end, cut, singe, and tie a knot on the last link:


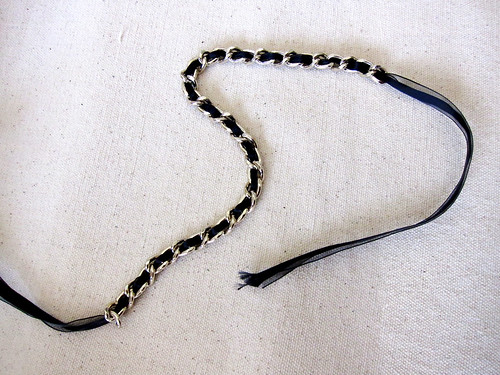
Now you have something that looks like this:

Tie knots at the end of the ribbons like this:

Wrap it around your neck or wrist, tie a bow. Done!

Good luck!

January 17, 2011

Bath Fizzies Semi-Fail

I had this grand idea to make bath fizzies/bombs. You know, the ones you throw into a bath and they are supposed to fizz.  Ones that I thought would be fun for a toddler to experience. Ones that sell at Lush for $5 each.

Google provided me plenty of recipes and most called for a powder form of citrus acid, which I don't have. But I saw some recipes that stated it could be substituted with lemon juice and/or cream of tartar. Perfect, because I conveniently have both ingredients. And they will work!

Wrong.

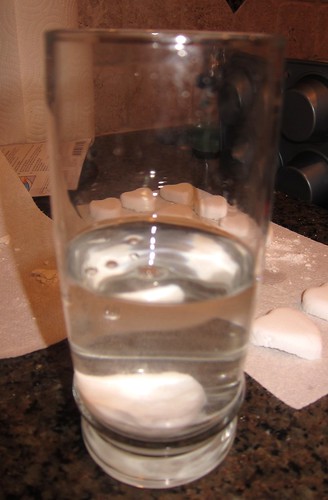
My concoction was great, until I tested it. NO fizz! Darn. It sure fizzed when I mixed the lemon juice in, but in a glass of water, it just slowly...melted. I think I've made some Bath Melts instead of Bath Fizzies.

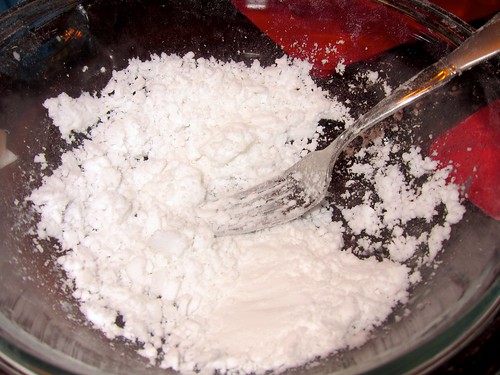
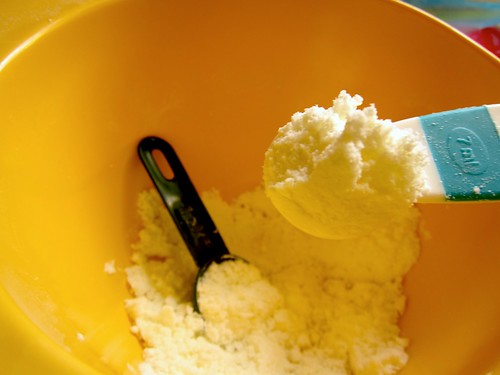
So here is the 1st batch, and should feel like wet sand. It is SO white...looks like something illegal is going on here, but I swear it's baking soda:


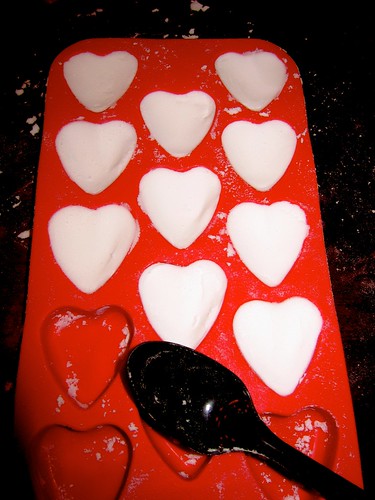
Packed into heart silicone mold (found at the Target's Dollar Spot):


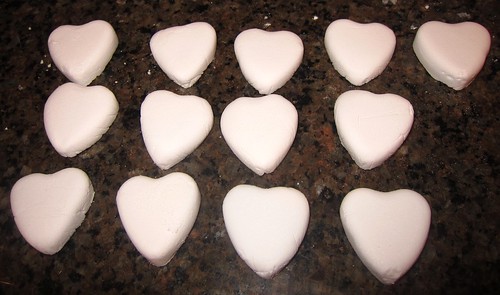
After drying for 24 - 48 hours, they harden and I carefully popped them out.  I was so excited:


For the 2nd batch, I added some cream of tartar and some coconut oil. And I shaped them into little balls with measuring spoons. I scooped generous amount of the mix on each spoon:


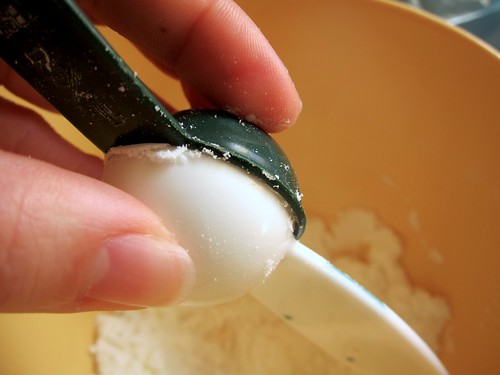
Then press them together, dusting off the excess:


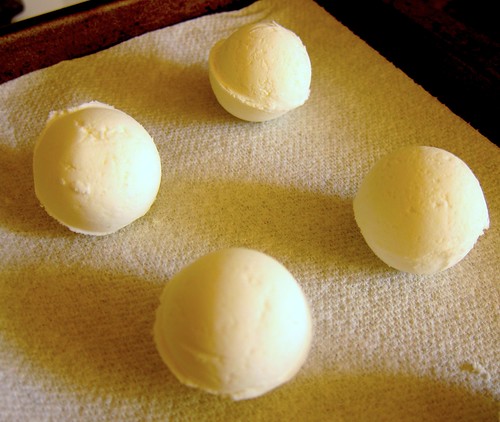
Then I released the top spoon and carefully rolled it onto a paper towel to dry:


They look cute, right?


FAIL! =(


 Where's the fizz? I might as well pick up some alka seltzer next time, haha!

January 07, 2011

How to Wear a Scarf

There is a fantastic youtube video on 7 Ways to Wear a Scarf. Genius, I say! When I wear a scarf, I just do "The Loop" because basically that's all I know how. There are more than one way to wear a scarf?? Amazing.

Being a stay at home new-ish mom - and I say "new-ish" because Little Boo is already 1.5 years old - my fashion sense disappeared. But it is very slowly coming back. Simply put, it's hard to go shopping with a toddler, and so I rather not go at all. I am in jeans and a frumpy old t-shirt every day. Or pajamas. Not by choice. May a scarf help me look more put together.

November 06, 2010

Flower Hair Clip

I made this for Boo, but it could be for me too! Super simple to make. Here it is clipped in my hair:

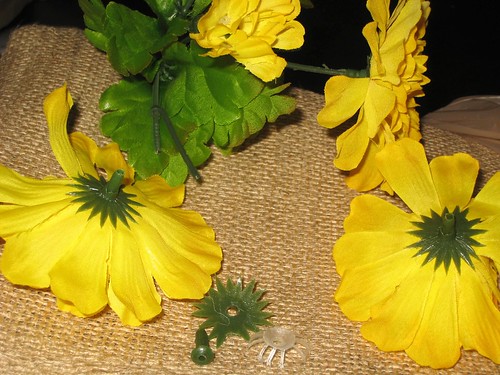
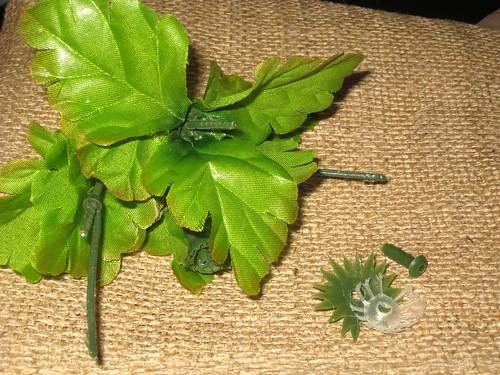
I got one bunch of flowers from the Dollar Store. Then I started to take everything apart. The leaves, flowers, stems, etc.


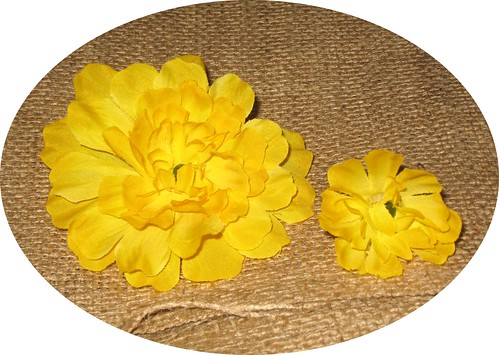
Your bunch should have big and little flowers. I took a smaller flower and added to the top of the larger flower to give it fullness. Then I snapped back on the 3 little parts from the flower (shown above), and trimmed the stem that stuck out. Then I superglued the petals by the stem, on the top and bottom as well:


You can save or discard the rest of stems and leaves:


When the flower dried, I hot glued it to a hair clip that I had wrapped with the same yellow color ribbon.  This was how the hair clip was made.


Done - now clip to your hair!

November 03, 2010

Clever Mascara Trick

I saw this neat clever trick to applying mascara on Youtube a while back, and have been doing it ever since.  Michelle Phan is one clever make-up guru! And she's got a great sense of humor: