December 10, 2011

Magazine Christmas Tree

I {heart} Martha Stewart.
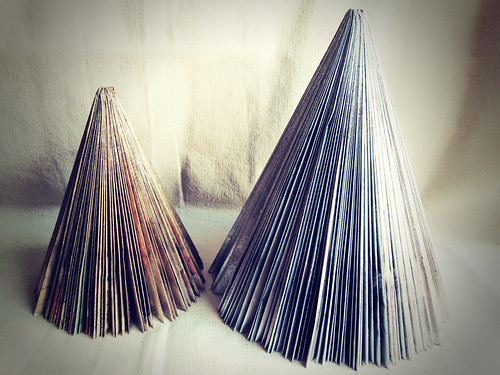
I had seen online at their Holiday Craft Sale, and they were selling them between $10 to $30 per tree.


Let's get started!
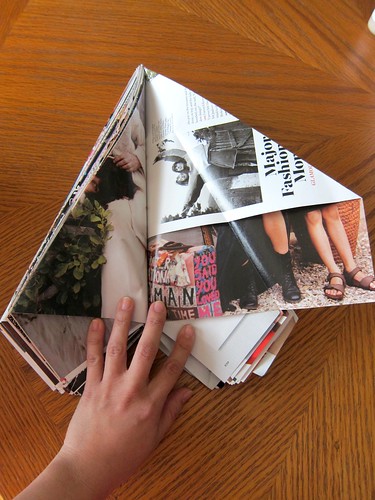
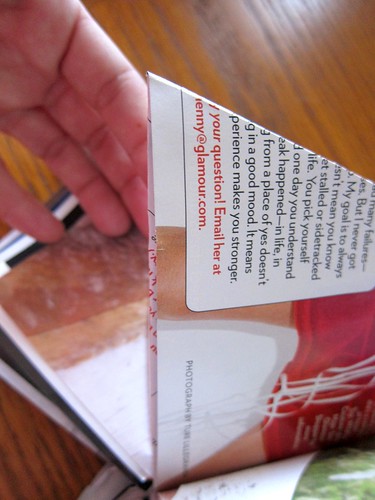
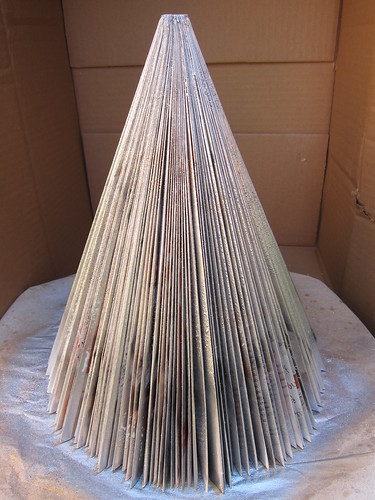
Get an old magazine, I believe this is Glamour. Bend the binding back and forth so it won't be so stiff.  Then taking one page at a time, fold the top right corner down like so:

Then fold the page down again like so:


and you will get something like this:


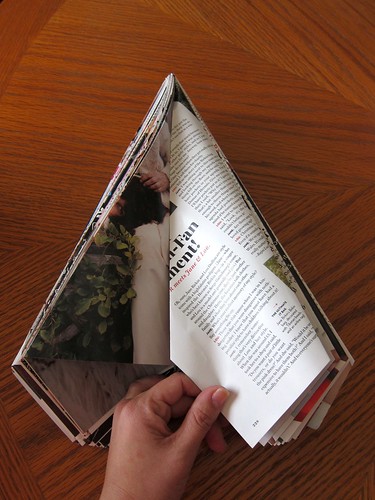
At the bottom of the "tree", fold the tip up:

And tuck it inside the flap:

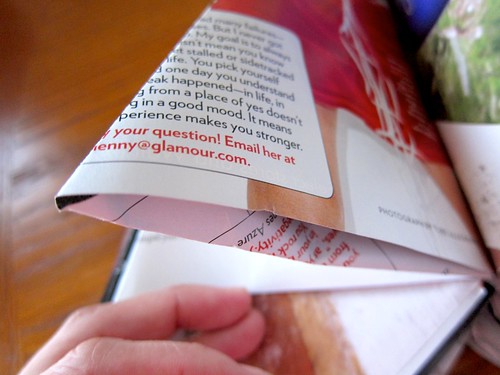
Make sure it's flush and straight:
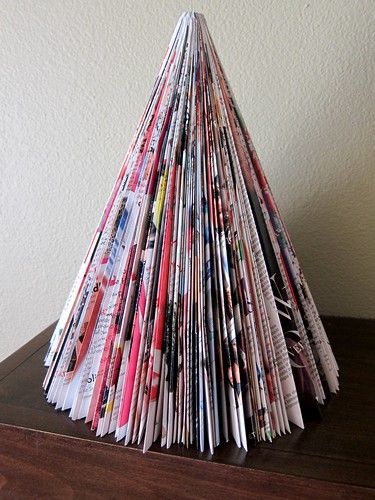
And done!

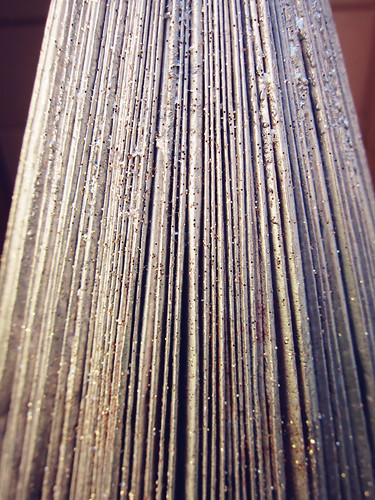
To glam it up, I used spray paint and glitter:
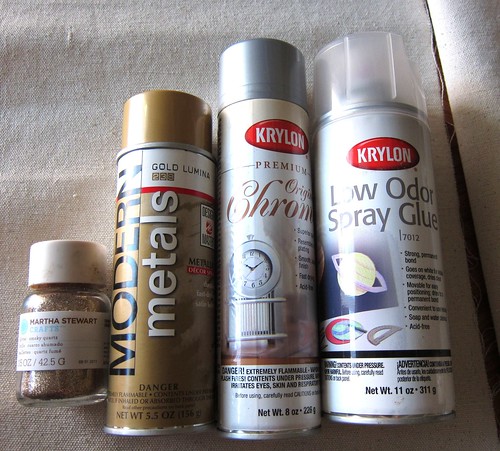
Martha Stewart glitter in Smoky Quartz
Modern Metals in Lumina Gold (which I do not recommend and will tell you below)
Krylon in Chrome
Krylon Spray Glue

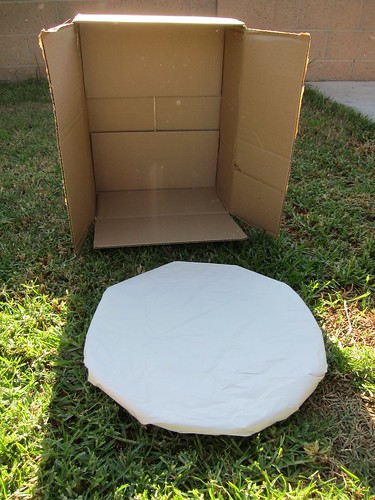
A makeshift spray booth with a cardboard box and a lazy susan I wrapped with paper:


The reason why I got the Modern Metal Lumina Gold was because Michael's ran out of the Kyrlon, which I do recommend. Modern Metal did not cover as well as Krylon, especially at the bottom of the tree, even after 2 or 3 coats. 

Then I gave it a coat of spray glue, and sprinkled on the glitter:

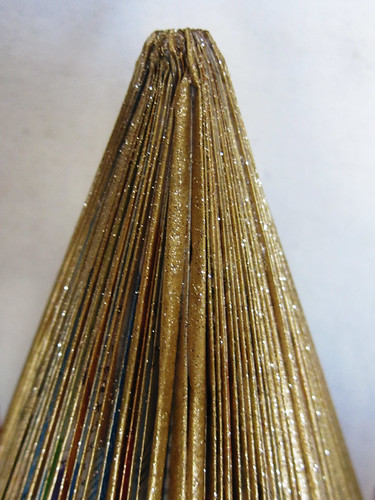
But the top looks nice:

The Chrome tree:


Good luck!
=)

December 08, 2011

Chain and Ribbon Jewelry

This is probably the easiest and simplest project I have done in a very long time!
The result is beautiful, and everyone will be impressed. =)

It can be a necklace or bracelet:

Wrap 2 or 3 times around the wrist:

Materials:

Chain - You can get it at Lowe's or Home Depot, or even a small dog leash chain would do. You will need pliers if you have to shorten the lenght.

Ribbon - I used a 5/8" width but next time I'll use a "fatter" ribbon

Scissors

To prevent the ribbon from fraying, there are two options: 
Using a lighter or using clear nail polish. 
But before you do the "heat and seal" method with a lighter, make sure the ribbon is made of synthetic material like polyester, which will melt at the ends when heated. Ribbon made of silk or cotton will just burn, so you will need to use the clear nail polish method instead, by just dapping it on the ends. 

Let's get started! 
With one end of the ribbon, and singe it with a lighter, or use a stove like I did because I couldn't find a lighter in the house. The ribbon doesn't have to touch the fire....just get it close enough and it will melt. It only take a few seconds and it goes fast:


Take the singe end and weave it through the links. I weaved it through each link, back and forth, but you can do every other link to create a different design:


When you get to the end, pull approximately 8 inches of the ribbon through (however long you prefer. Keep in mind you need enough to tie a bow). Then tie a knot at the end of the chain by weaving it through the last link:


Pull the same amount of ribbon on the other end, cut, singe, and tie a knot on the last link:


Now you have something that looks like this:

Tie knots at the end of the ribbons like this:

Wrap it around your neck or wrist, tie a bow. Done!

Good luck!

December 01, 2011

Candle Re-do

From this plain candle:

To this!


First, you need a piece of tissue paper with a pattern. I used tissue paper and printed music sheet pattern on it. The trick is to use double sided tape. Regular tape may not work well with inkjet printer, and it definitely does NOT work with laser printer (which is what I have). Cut the tissue paper the same size as a regular piece of printer paper. Place the double sided tape on the upper, lower and sides of the printer paper. Stick the plain tissue paper on top. Put the whole thing in the paper feed of your printer. 
Then you are ready to print:

Carefully remove the tissue paper from the printer printer, or just cut off the sides. Wrap the tissue paper around the candle. If it is not enough to cover the entire candle, print another tissue paper - add it onto the candle and align the pattern. You may use a small amount of glue to hold it in place:

Get a large piece of wax paper and wrap it over the candle. Hold the excess wax paper in the back. This will protect your hands from the heat.

Yes, I said Heat because you will use a heat gun, or an embossing gun (as I did, and it looks like this):
Or I think a hair dryer on the lowest setting will work as well. Use the heat gun to lightly melt the candle and tissue paper together. Do small sections at a time and turn the candle around. It goes fast. The wax paper will become shiny and the pattern can be seen clearly through the wax paper. You will know. =)

Lift the wax paper off and you will get something like this:


I imagine this tissue paper will be perfect for the holiday:

Good luck! 

Pretend Make-up

Boo loves my make-up, specifically, eye shadows and brushes.
So I went to the dollar store [Dollar Tree or 99 Cent Store, both places will have something similar], and got this:

I used a small flat head screw driver and pried off each of the rectangle pots of eye shadow. I discarded the eye shadows and filled each empty spot with acrylic paint I already have.  Fill it carefully to the rim. When it is drying, it'll diminish the amount of paint. I just kept refilling them:


I mixed pearl white paint into some colors: 

It looks really neat. It will take a l-o-n-g time for it to dry:

Hopefully this will do the trick and she will like it. =)
Good luck!