February 17, 2011

3 Techniques to Fabric Flowers


I like fabric flowers. They are cute and so versatile. You can do so much with them. Sew or glue it on a pin, hair clip, necklace, headband, bracelet, handbags, baby hats, shirts (good for covering up a stain)...the possibilities are endless! They are truly simple and easy to make. The great thing about them is that nothing needs to be perfect or precise. 

1) Rolled Fabric Flowers

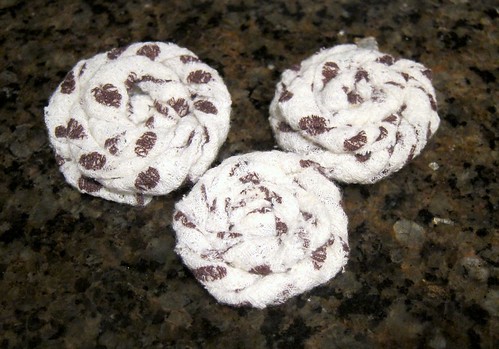
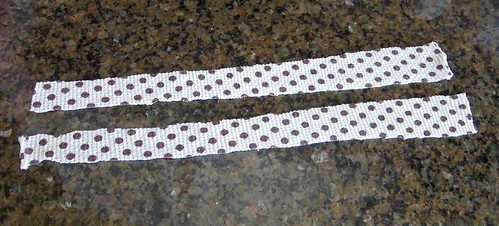
Start with 2 strips of material 1 inch in width, and as for the length, the bigger you want the flower, the longer you need. I used about 14" inches.  I recycled and cut from a tank top I haven't worn in years:


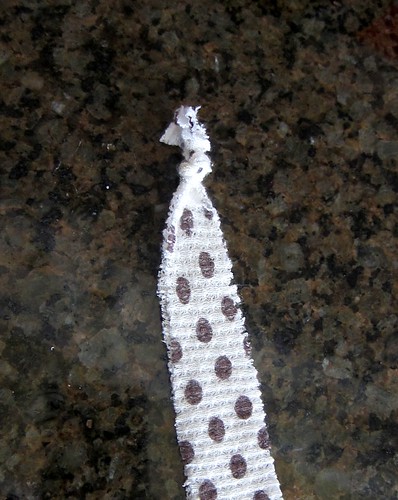
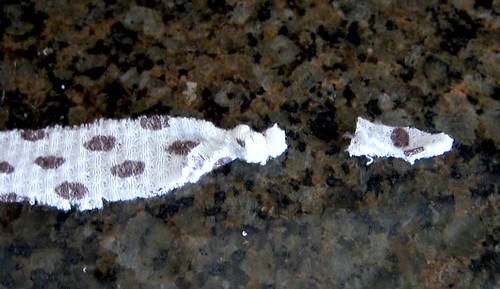
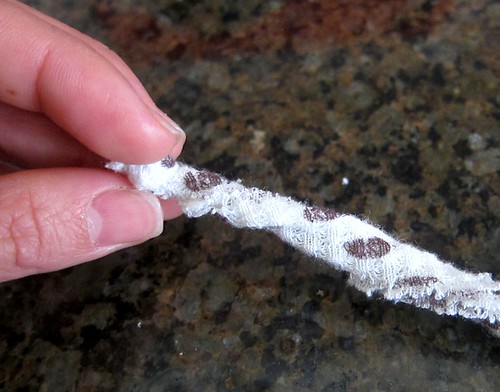
Stack them so the right sides are face out, make a knot on one end, and cut off the excess:


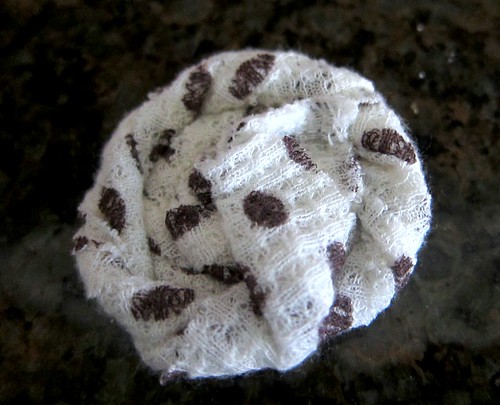
Hold on the knot and with your other hand, twirl the strips a few times, wrapping it around the knot as you go. Be careful to not twist it too tight:


Every couple of twirls/twists, I would dab a tiny bit of fabric glue on:

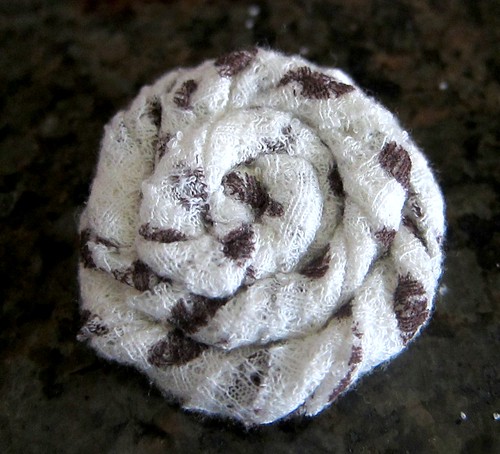
When you get to the end, just fold the last 1/2 to 1 inch of fabric to the back and glue"

Flip it around and here is the front. Done!

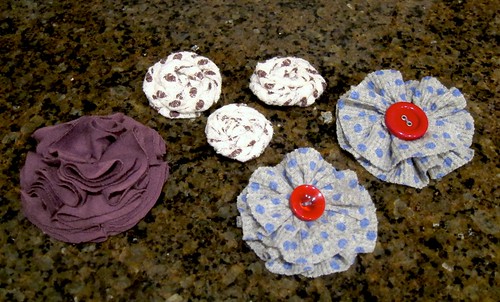
2) Gathered Fabric Flowers

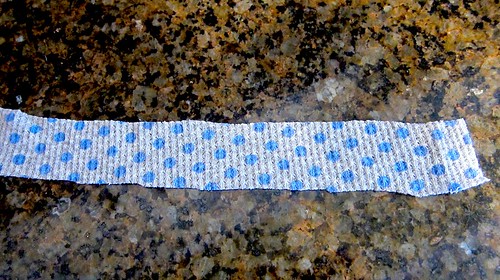
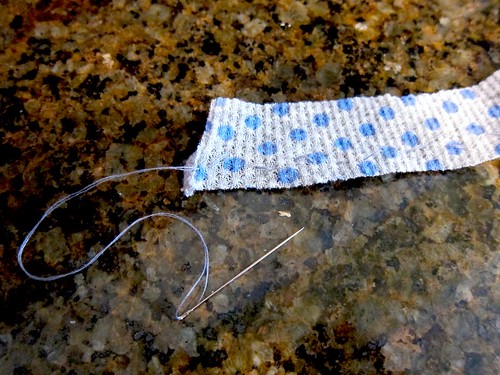
Start with a strip of material 1 inch in width and about 24 inches in length.  I recycled another old tank top! 

With a needle and coordinating thread, make a straight running stitch on the edge of the long side, for the entire length:


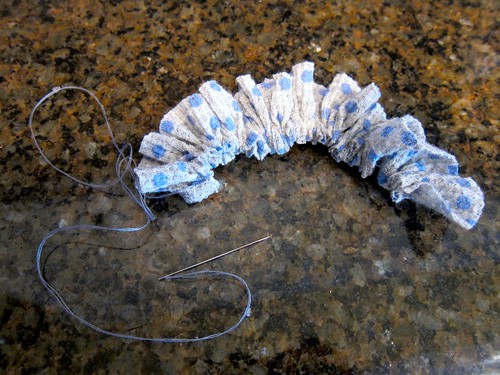
When you get to the end, do not knot or cut the thread. Simply hold the end of the thread and gently pull the fabric down. It will start to gather:

Wrap it around itself twice to form into a flower shape:


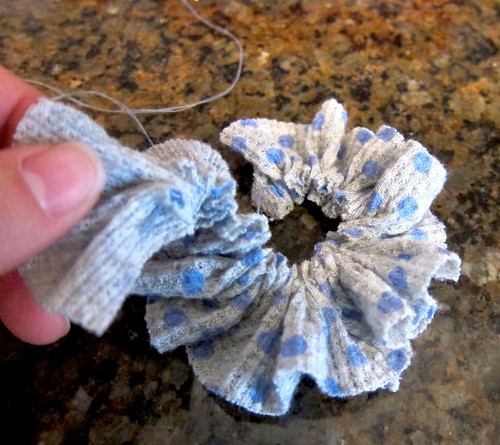
Fix the shape if necessary. Take the needle and sew the middle together. Remember to sew through both layers. Here is the back:

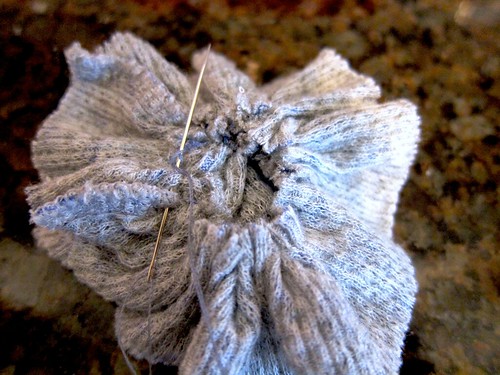
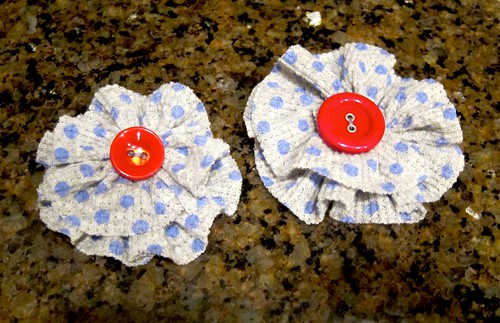
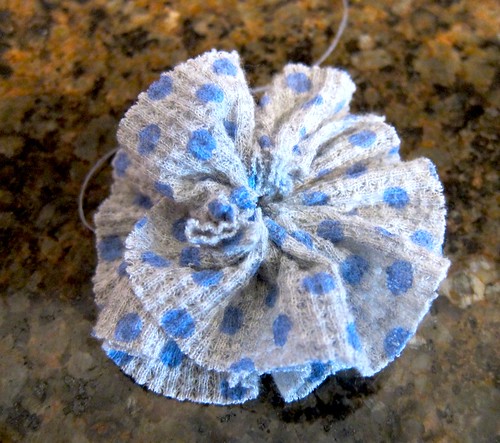
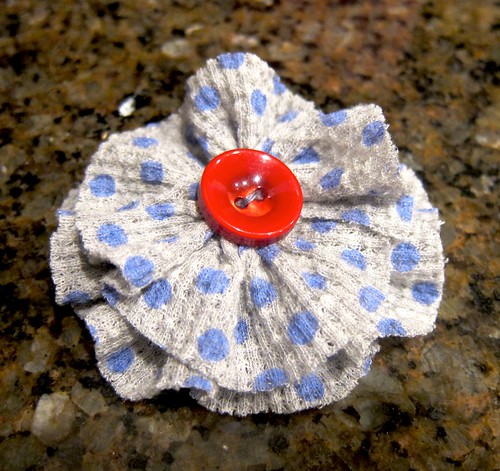
Sew a button in the front and you're done!

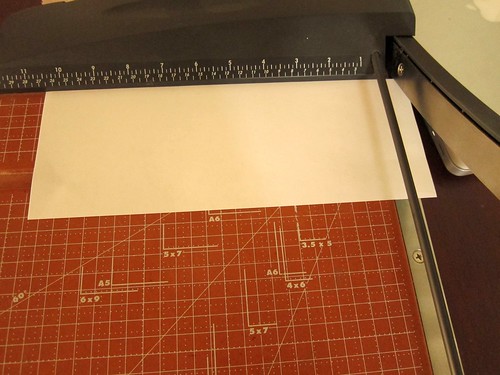
3. Circle Fabric Flower

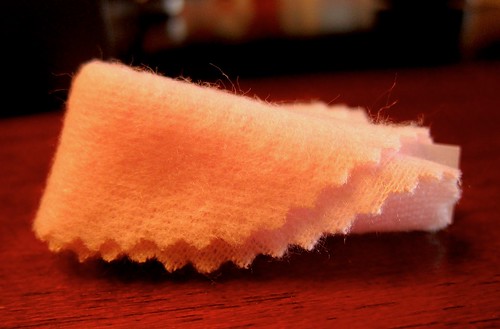
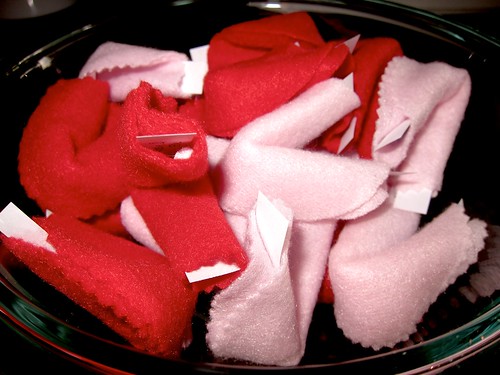
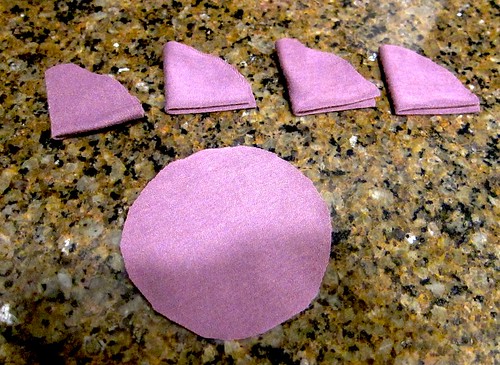
You will need to cut 4 circles with a 2 inch diameter, 4 circles with a 2.5 inch diameter, and 5 circles with a 3 inch diameter.  I used another shirt that I don't wear anymore. I found different size cups with those diameter, and traced onto the fabric:

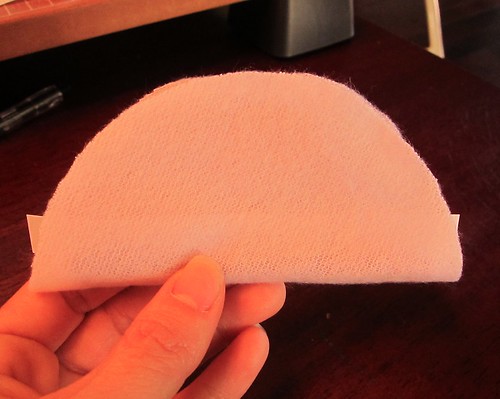
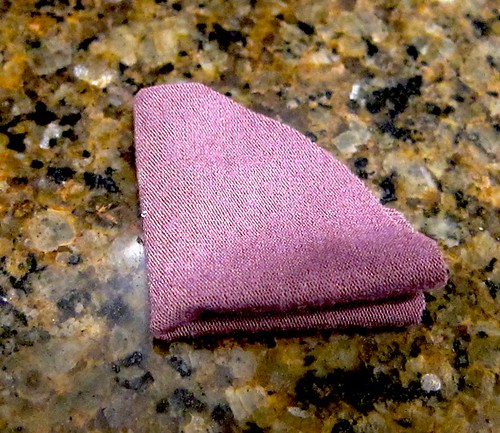
We will start with the stack of 3 inch circles. Take a circle and fold it in half, then half again:

Now we have a "petal":


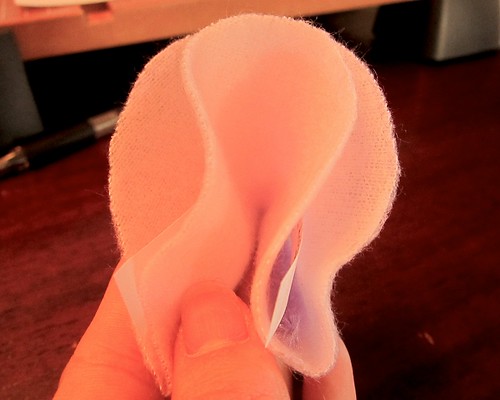
Fold 4 of the 3 inch circles and leave the last one out:

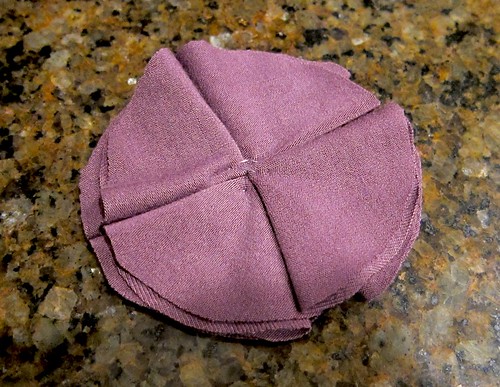
Take one petal and put it on top of the circle.  Take a needle and coordinating thread, and sew the tip of the petal corner to the middle of the circle:

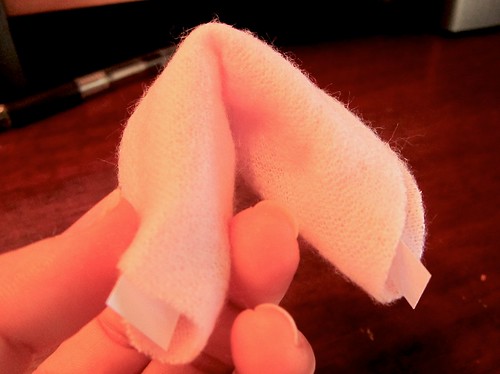
Put a second petal and put it opposite of the 1st petal. Then sew the tip:

Add the last two petals on each side, and sew. Now you have the 1st "petal layer":

Take the stack of 2.5 inch circles and fold all 4 into petals. Take a petal and put it on top of the petal layer, making sure it covers the seam from the precious layer like this:

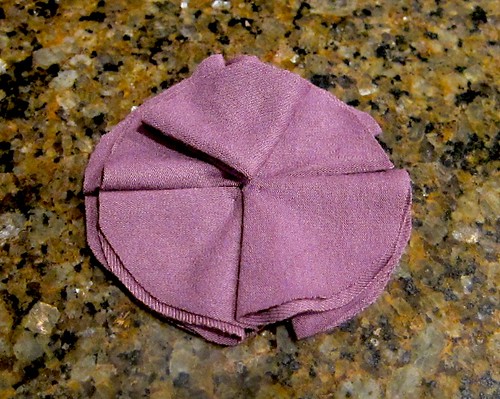
Then with the same process, create a 2nd petal layer:


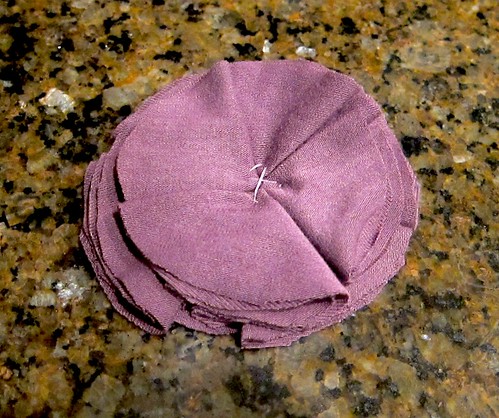
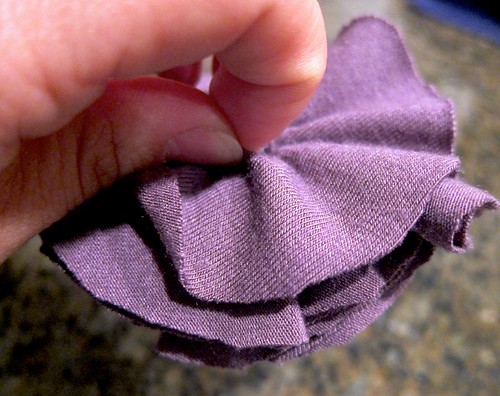
Now take the four 2 inch circles and create the last petal layer, covering up the seams from the previous layer. With this top layer, you want to make sure your stitches are neat, as it will be visible:

The sewing is done but it doesn't quite look like a flower yet:

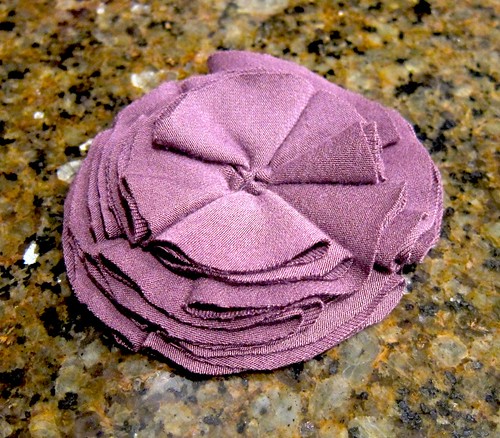
Here is the magic - hold it upside down and give it a nice gentle shake:

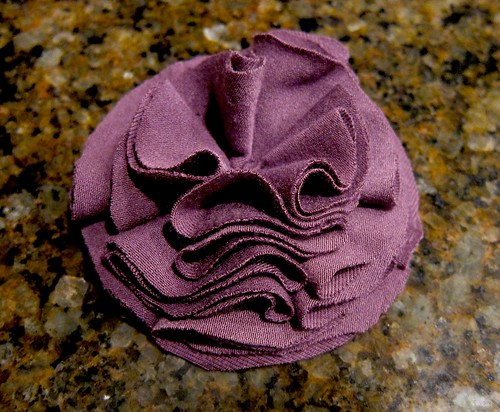
Flip it over, and ta-da, done!

I hope you find this tutorial helpful.


Which ones do you like the best?
Good luck and enjoy your beautiful fabric flowers!

February 02, 2011

Papaya Bread


Last week, I took Little Boo to visit our neighbors. They introduced papaya to her, and she loved it - ate half of one within minutes. Seriously downed it! The very next day, I bought some papayas, and from the same store too. Guess what? Little Boo didn't even take a bite. She was over it. I ate one, but I couldn't eat all of them. So I Googled for any recipe calling for papaya. 

This papaya bread is delicious. The Husband even approved, and that truly means something in our family!

Ingredients:

1 cup Sugar
1/2 cup Butter
2 Eggs
1 cup Mashed ripe papaya
1/4 cup Chopped walnuts (or any nuts of choice & amount to your liking)
1/2 cup Raisins (optional & amount to your liking)
1 1/2 cup Flour
1/2 tsp Baking Powder
1 tsp Baking Soda
1/2 tsp Salt
1/2 tsp Cinnamon
1/2 tsp All Spice
1/2 Ground Ginger

Directions:

1) Cream sugar with butter until light.
2) Add eggs and beat until fluffy.
3) Mix in papaya, nuts and raisins.
4) In a separate bowl, whisk together flour, baking powder, baking soda, salt, cinnamon, all spice and ginger.
5) Add this to the butter mixture a little bit at a time while mixing until all incorporated.
6) Pour batter into a greased and floured loaf pan. Bake at 325 degrees for 1 hour and 5 minutes.

Yum!

February 01, 2011

Fortune Cookie Valentines


Materials:

Felt or Fleece
Scissors (regular, fabric, and optional pinking shears)
Printer paper
Chenille stems
Glue
Margarita glass or a circle template around 4.25" diameter
Pen

With Chinese New Year in a few days, and Valentine's Day around the corner, this is a cute way to incorporate both events together. I was at the Dollar Tree looking for some craft felt sheets. Then I saw these "baby blankets" made of some material blend that feels like felt/fleece. Hhmmm, yes! They are perfect for our Fortune Cookie Valentines. They come in a range of colors from yellow to blue to purple. But because it is for Valentine's Day, I got one red and one pink blanket. Notice these are two different kinds; the pink one has scalloped edges. Both material will work great and won't unravel:


I also picked up a pack of these chenille stems at the Dollar Tree:


With a margarita glass or anything you find with a 4.25" diameter, trace it on the felt/fleece with a pen, and cut out with fabric scissors.  Try to cut on the inside part of the line so the circle will have minimal pen marks:


The circle does not have to be perfect. Fold it in half and trim so it's even to a near semi-circle shape with either fabric scissors or pinking shears:


Pinking shears make zig zag cuts: 
Unfold the semi-circle and with regular scissors, cut the chenille stem to about 4". It should be a little shorter than the width of the circle. Glue it down in the middle of the circle. You can use tacky glue or hot glue, but I found both too messy, so I used permanent fabric glue. Lay a strip of 4" x 0.5" printer paper above the chenille stem (don't forget to write a sweet fortune/note on the paper!):


The glue I used:


Cutting strips of paper - you can use regular scissors but I have a paper trimmer. The easiest way is to cut the printer paper down the middle on the longer side, then cut out the 0.5" strips from the shorter side:


With the chenille stem glued and dried, and the paper strip with a sweet Valentine's note above it, fold the circle in half:


Then bring both ends in the middle and fold like this:


Then fold the top down like this:


Ta-da, you're done! This is what the pinking shear'ed fortune cookie looks like:


Here are the reds and pinks:


All in a bowl:


Happy Chinese New Year, and have the sweetest Valentine's Day!

oneprettything

Totally Tutorials Blog

handmade projects