Recipe:
1/2 cup salt
1 cup flour
1/2 cup water
Mix the salt and flour together in the mixer bowl. Using a dough hook, slowly add the water in. After a minute or two, take out the dough and knead on a floured surface. It will be dry and crumply but it's ok. You can add droplets of water as you knead. Put a piece of wax or parchment paper on top of the dough, and with a rolling pin, roll it out to about 1/4 - 1/2 inches in thickness. The wax paper will keep it from sticking to the rolling pin. You can do without the wax paper, and instead flour the rolling pin but adding too much flour will change the dough consistency. Peel the wax paper off and cut out the heart shapes as you would with real cookies. I had the hardest time trying to explain to a 1.5 year old that this salt dough stuff is not cookies [or as the baby says, "toktees?! toktees!"], and they do not taste good.
Make sure everything is dry - you don't want any stickiness. Line cookie pan/sheet with wax or parchment paper and place the shapes in. Don't forget to make holes for the string, and make sure the hole goes all the way through! I used the larger end of a chopstick. Bake at 250 degrees for 2 hours. Let them cool down for a few hours. I needed two batches to get the amount of hearts I made. I had to flip the shapes and poke again to get the holes through:
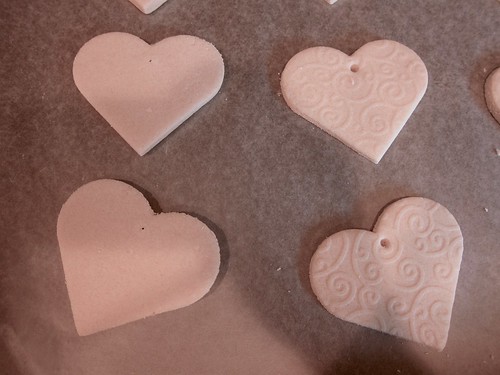
Bake and dried:
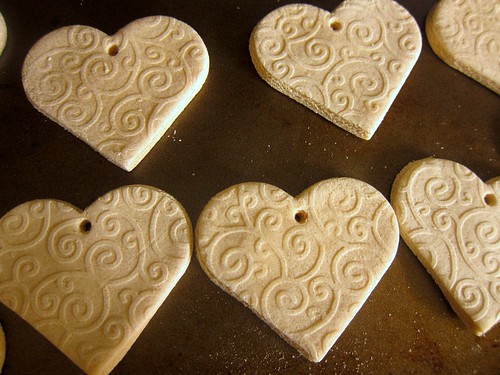
But there is something extra I did. How I got the swirly pattern on the hearts:
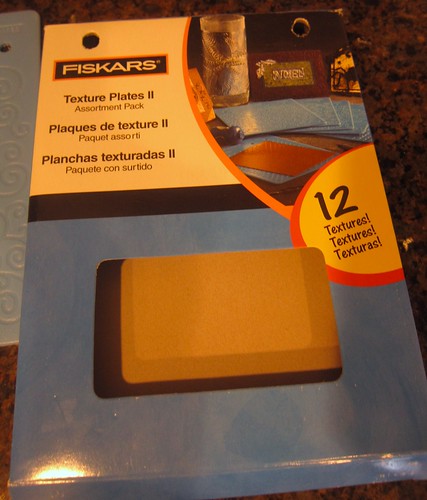

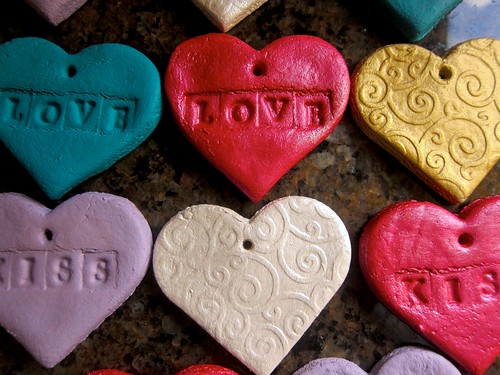
After rolling out the dough, I used Fiskar's texture pattern plate and placed it upside down on top of the dough. The plates are used for embossing papers, but I thought it would work on dough. And it did! I used the rolling pin to roll and "transfer" the pattern on. Then I used the heart cutter to cut out the shapes. And bake.


How I got the words on the hearts:
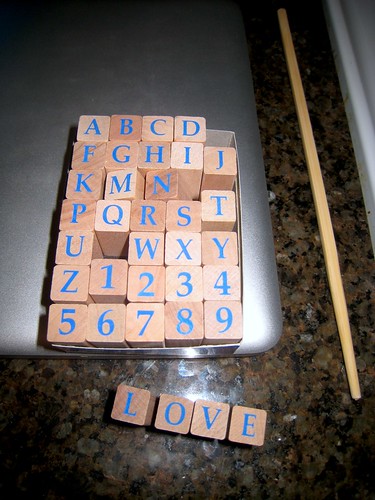
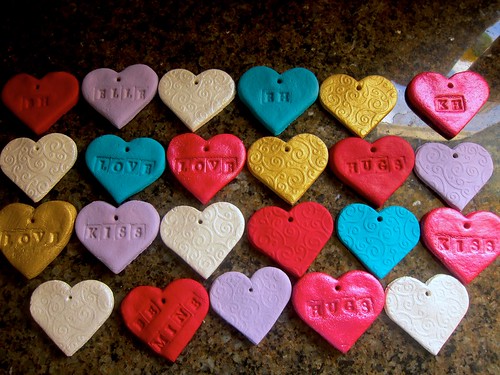
After rolling out the dough, cut out the heart shapes. Then I used this letter stamp set I got at Big Lots for $3 on clearance. I simply pressed it each letter onto the dough. And bake.
After they all dried, I painted them. The small Delta bottles are on sale (as of yesterday, Wednesday Jan. 6th) at Michael's for 89 cents each. I have some regular matte ones, and some "pearl" ones. They have a pretty shimmer finish. This is the difference between the gold pearl and a regular purple. Both without the glossy finish spray:
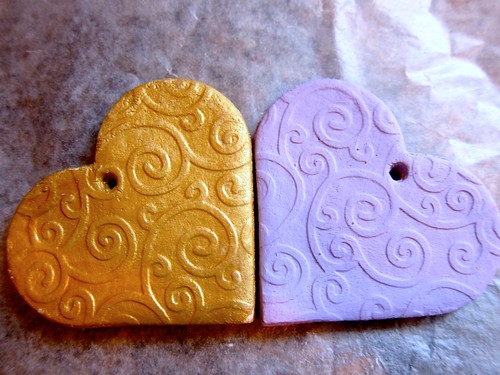
Here are the names of them from left to right - Kryon low odor clear finish glossy spray, Delta pearl finish, Delta seashell white, Folkart purple lilac, Delta fuchsia pearl, Delta metallic 14K gold, Delta laguna blue, and Delta rooster red:

For the the white hearts, I painted the pearl finish on top of the seashell white.
After 2 to 3 coats of paint, I got a can of Kron's clear glossy finishing spray ($6.99 - forgot my Michael's 40% off coupon, darn!) and gave them 2 light coats.
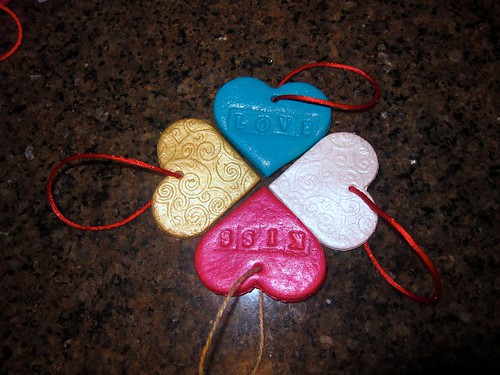
Put string through, hang them on the tree, and...done!
=)


What a neat idea!! I love it. And this seems so easy to do, too!! If my tree was artificial, I would consider making this a new tradition for the Muehlhaus', too! Can't wait to see a picture of your tree once it's all done up for Vday!!!
ReplyDelete@ Andrea -thank you! =) You can still make these! Get a little artificial tree for the kids. =)
ReplyDeleteWhat a fun project! Great idea, thanks for sharing!
ReplyDelete@ Julie H - thank you! You do fantastic art work; I just check your blog. =)
ReplyDeleteI love this!
ReplyDeleteI made salt dough ornaments like this one year with the kids for Valentine's favors....they strung them on longer ribbons to make necklaces. Super fun! I love the embossed pattern you did on yours, though!
ReplyDelete@ Kelly - thank you!
ReplyDelete@ ValentineGirl - making it into a necklace is a great idea! I'll have to try that on day. Thanks!
ReplyDeleteAbsolutely gorgeous. I love doing salt dough projects. Wondering how I can get texture without going and buying an embossing plate? Hmmm, I'm sure I can come up with something.
ReplyDeleteWell done idea!
ReplyDeleteGot a nice blog and great ideas.
ReplyDeletehello....
@ UKZoe - Thank you! I just rummaged through my craft supplies and the embossing plates were what I had in hand. I am sure you have something too. I am very interested to see what you come up with!
ReplyDelete@ Suzana - Thank you, and wow I just read your blog - I really like the pencil holder you made from shoe boxes!
ReplyDelete@ Melanzana -thanks, I try. =) You have yummy treats on your blog! I am sure they are all delicious.
ReplyDeleteThat's super clever of you. I might try this one. uuhhmmm... juz wondering if this will rot.
ReplyDeleteGreat idea - and especially smart to think of the Fiskars texture plates - they look fabulous with all the different colors and textures - great job!
ReplyDeleteThey're beautiful! Well done!
ReplyDelete@ Yannie - Thank you! You have a very good point about them rotting. After doing some searches on Google, it seems that as long as we seal it (as I did with the glossy finish spray), it will keep the moisture out. And they should be good from any where between "1 to 2 years" to "Forever until they break". I am quoting from what other people said. =) Thanks for bringing that up again!
ReplyDelete@ Darcy - Thank you and I absolutely adore your blog!! You have much precious children.
ReplyDelete@Dawn - thanks! My silly mind surprises me at times, haha!
ReplyDeletethese are really pretty!
ReplyDeleteI'll try using my texture plates like that, great idea
Those are so adorable! I love how you added the texture - what a great idea!
ReplyDeletelove this tutorial thank you, hoping to create this weekend with the boys :) x
ReplyDeletelove! very cute idea!
ReplyDeletedo you think i could put a picture on it and it would stay? Trying to make memorial christmas ornaments with a picture...
ReplyDeleteHi Amy, Yes I think so. Maybe with mod podge and finish with a coat of the finishing spray?
DeleteYour texture plate is from Fiskars, and "Flaskers."
ReplyDelete*not "Flaskers"
DeleteThank you for catching my typo. It's fixed!
DeleteIs that 250 degrees fahrenheit?
ReplyDeleteLOVE LOVE LOVE the Fiskars template idea! Thanks so much for sharing. I can't wait to make these as gifts for my family. :-)
ReplyDeleteI have a website with all sorts of crafty ideas and free teaching materials for PK-2nd. If you get a minute, would love for you to stop by.
http://www.teachwithme.com/
If I put polyurethane on them would they hold up as coasters?
ReplyDelete