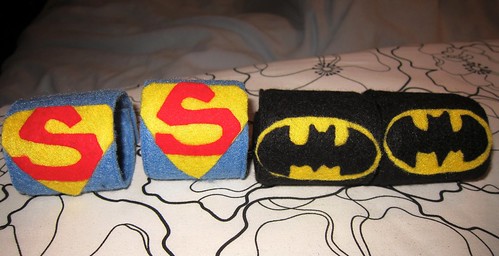
Materials:
* 1 paper towel tube
* Felt fabric in colors of your superhero(s)
* Plain white paper
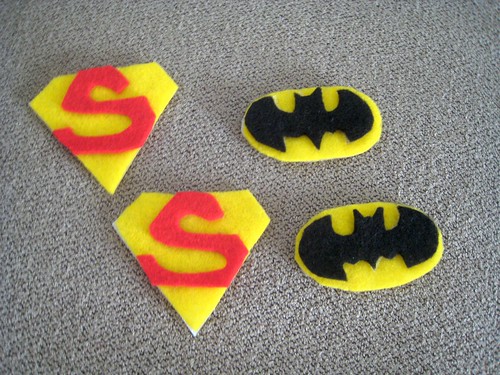
* Superhero emblems - I Googled the images and traced right on the computer monitor, hah!
* Scissors
* Double stick fusible web - I used the Steam A Seam brand
* Pencil
* Ruler
* Duct tape
* Velcro squares - Do not use sticky back ones (lesson learned, with sticky and gluey sewing machine needle)
* Iron and ironing board
* Sewing machine and threads matching felt fabric colors
Instructions:
Don't throw away paper towel tubes!
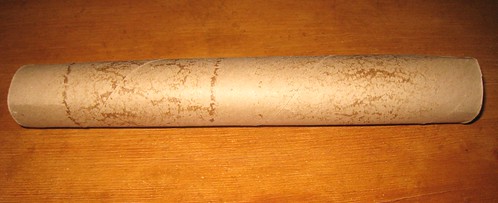
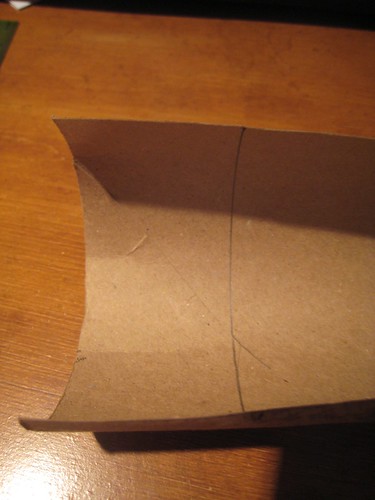
Get a ruler and pencil, draw a line down the middle [the long side], and cut it in half. The pencil mark is just a guide, so don't worry if you don't cut right on it.
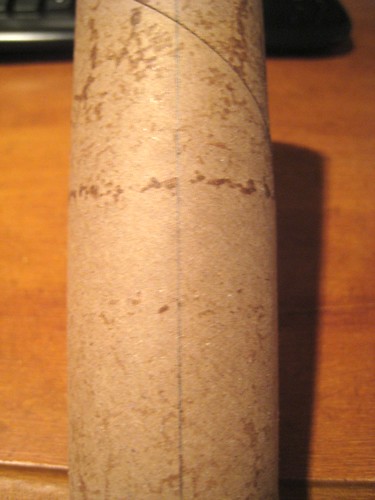
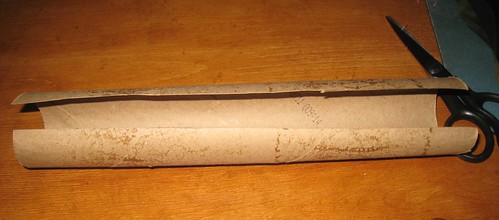
Open the tube, and draw a line inside the tube [the short side] at the 2 inch mark, and cut out. This is for one cuff, so you'll need to cut a second to make a pair of cuffs.
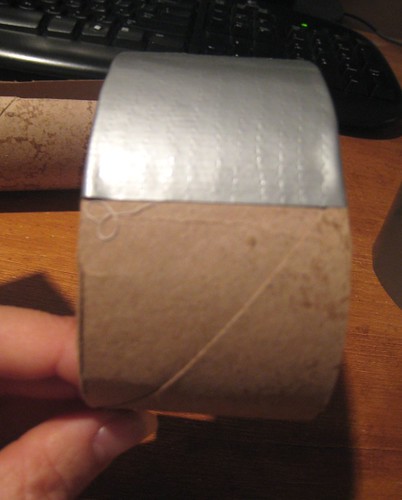
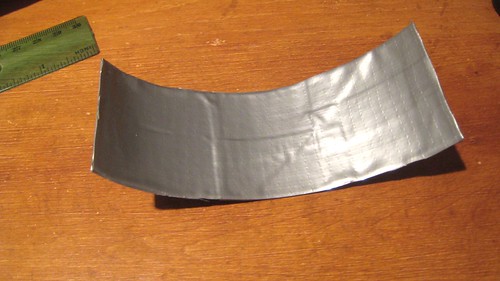
Get duct tape and cut a small piece to tape and smooth the edges. Do it on both ends, and be sure to have enough to wrap over the top and down the inside/backside [where it curves in].
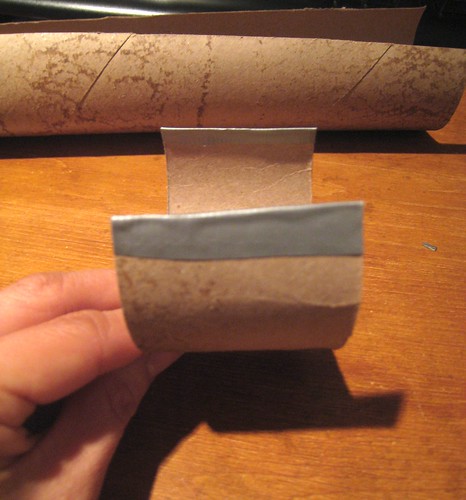
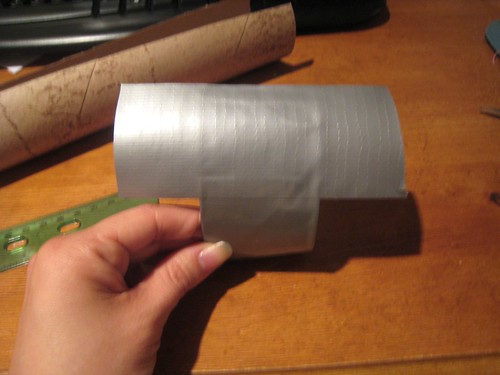
Now you need 3 longer strips of duct tape to wrap all the way around, to make it sturdier. I see it as a top, middle and bottom section. I prefer to tape the top and bottom sections first, then the middle. Set aside for now.
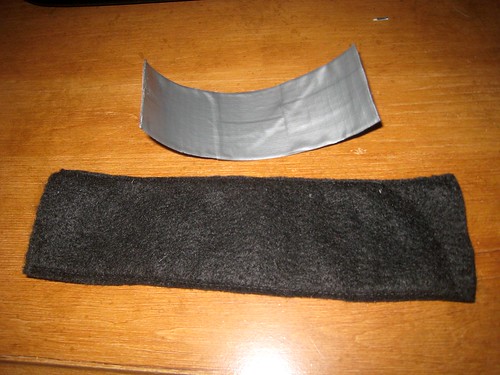
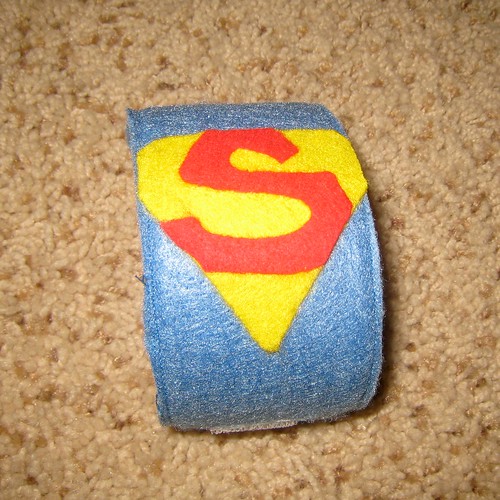
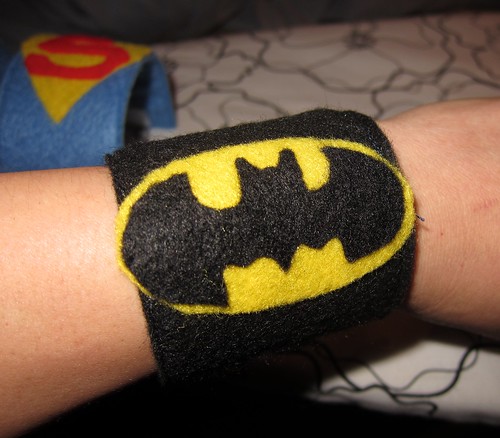
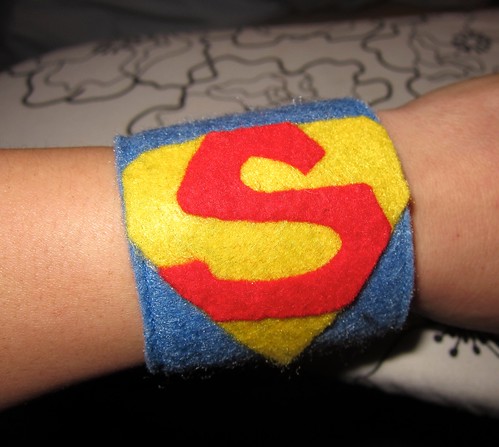
Now you need two strips of about 2.5 inch x 7 inch of felt fabric for each cuff base. The length is just an estimate - you may want to measure the child's wrist prior. You'll need 4 strips for a pair of cuffs. I chose black for batman, and blue for Superman. This is where I messed up the first time, and forgot to take pictures when I did it correctly. You want to sew the velcro squares on first before sewing the two strips together.
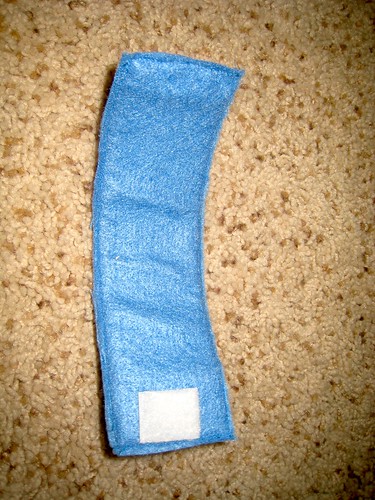
See there is no velcro here, and you do not want this:
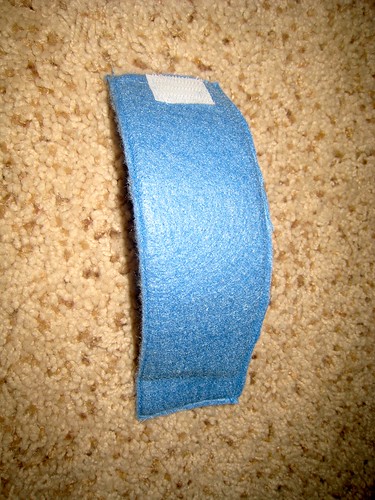
Stack the two strips together. Make sure the top strip has the loop velcro (the fuzzy side) at the bottom -and when you flip the stack of strips around, the hook velcro (the prickly side) is on the top. Test it out first! Then sew the along the long sides. Now you have a felt "tube". Pretend that the velcro is there.
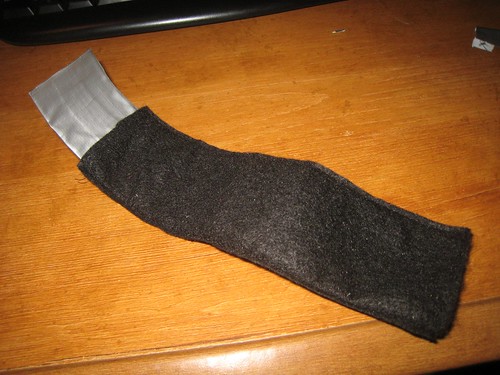
Get the duct taped paper towel tube strips, and you should be able to slide one into the felt "tube". Sew the two short sides together. Now you should have a finished plain cuff base. Set aside. See how the velcro hook is at the top here.
When you flip it over, the velcro loop is at the bottom. This way, the child's wrists won't get scratched when putting it on themselves. Again, learned it the hard way as I tested it on myself. Haha.
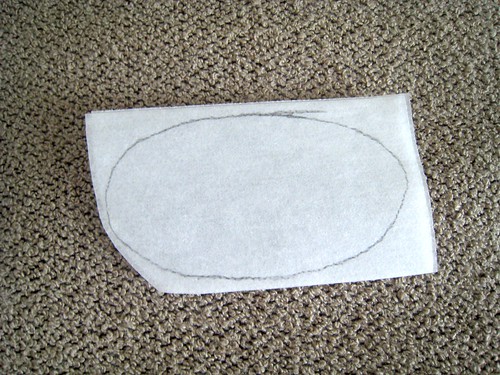
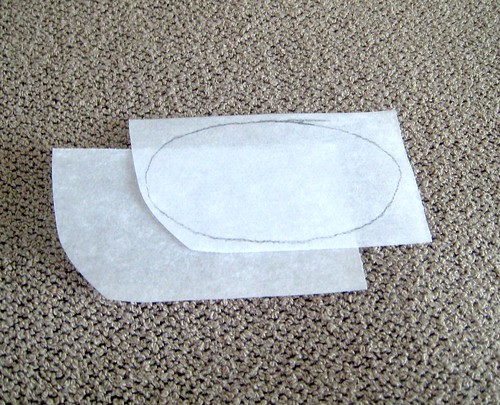
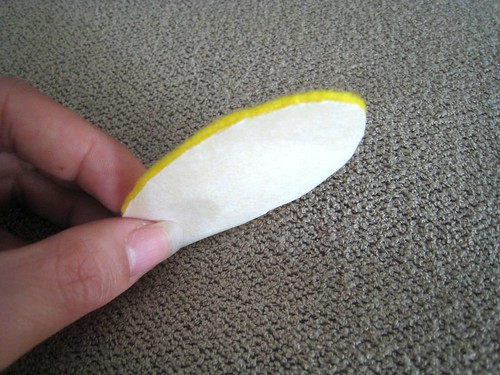
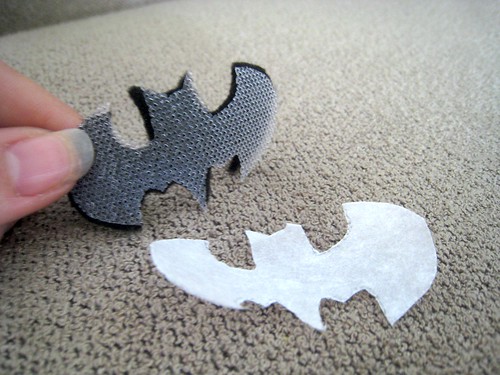
Get your package of double stick fusible web and follow its instructions. For mine, I cut a piece of fusible web bigger than the shape I need. I took the cut out oval and traced it on the side the instructions said to. Note: When you trace, you need to have any letters reversed. It does not matter for shapes such as ovals, triangles, bats, etc. But for example, the "S" for Superman will have to be reversed.
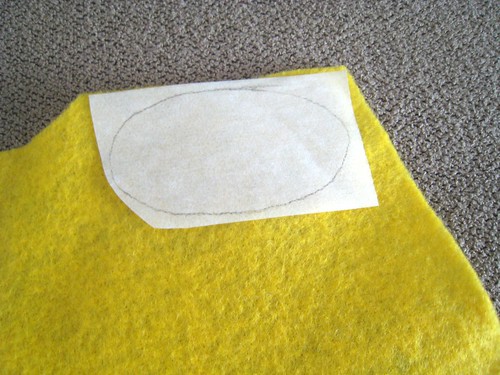
I took off the backing (at the bottom) and stuck it onto the yellow felt. This is where the "double stick" comes in so handy because it sticks to the fabric as you are cutting, so you get straighter and sharper cuts, and it doesn't go all over the place....the oval could turn into a triangle. ;) It'll make sense when you're doing this, hopefully. Repeat with the rest of the shapes.
Once you ironed the emblems onto the cuffs, velcro it together so it maintains its shape when it's cooled.

p.s. I hope I included all the steps. Comment below if you have any questions. And the next time around, I would use thicker/better quality felt fabric. I just got the cheaper kind that comes in a package. It's just for more durability and sustainability...I will let you know how long they last with my nephew! Hehe.


Very cute and I agree, those sticky back velcro are torture on the sewing machine and they do not stick on to anything! I don't like those at all. I'm linking from Oneprettything.
ReplyDelete@ Ramirez - thanks for visiting! Yes, sticky back velcros are just a mess. My poor sewing machine, heh heh.
ReplyDeletethanks for this cute idea;)and now...i must look at spiderman...(uuuuhhh filigree)my little boy loves the spider;)
ReplyDelete@ Anti.mensch - have fun! Link up a picture after you make a pair. I would love to see them! My nephew loves ALL superheros and it was hard to narrow down just to two. =)
ReplyDeleteJust delightful! What a wonderful gift as it will encourage imaginative play. I will feature/link in a future post so others can come visit.
ReplyDeleteThanks for sharing,
Pearl
Are your edges raw? I tried these super quick and the edges don't look no where near as nice as yours! Thanks!
ReplyDeleteAre your edges raw? I tried these super quick and the edges don't look no where near as nice as yours! Thanks!
ReplyDelete@ Monique - The edges are raw. It should be ok as long as it's felt. I was able to cut the shapes really good after I stuck the double fusible web on. And it hasn't fallen apart. lol. =) Good luck, wish I could help more.
ReplyDeleteThanks so much! Sorry about the double post! :) LOVE the tutorial! :)
ReplyDeleteI just made these but without paper towel rolls... will be uploading post today.
ReplyDeleteur version looks great & fun.
Oh! I love these! My husband loves Superman and my sister loves Batman. Excellent job and you've gained a new follower.
ReplyDeletehttp://everydaymealsfortheeverydayfamily.blogspot.com/