
What you need:
Around 35 pretzel rods [and extras in case a few breaks in the process]
12 oz [baking] milk chocolate chips
6 oz [baking] white chocolate chips
Shortening
Tall microwavable glass or mug
Microwavable bowl
Cookie sheet lined with wax paper
Fork
Pan of warm water
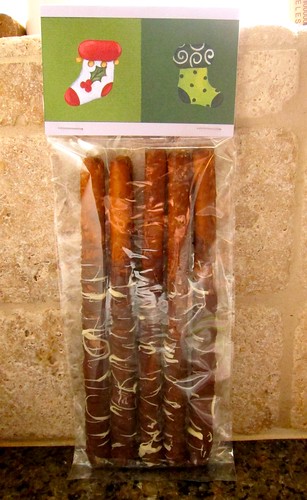
Treat bags and embellishments
Directions:
1) Line wax paper on cookie sheet and set aside.
2) In a tall glass or mug, add the milk chocolate chips with a tablespoon of shortening.
3) Melt milk chocolate - Put it in the microwave for 30 seconds. Take it out and give it a stir. Put back in microwave for 20 seconds, take out and stir. At this point, the chocolate should be pretty much melted. Every microwave is different, so it'll be trial and error, but remember to not over heat it.
4) Place the glass or mug into a pan of warm water to keep the temperature up.
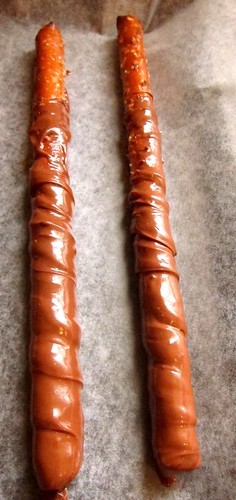
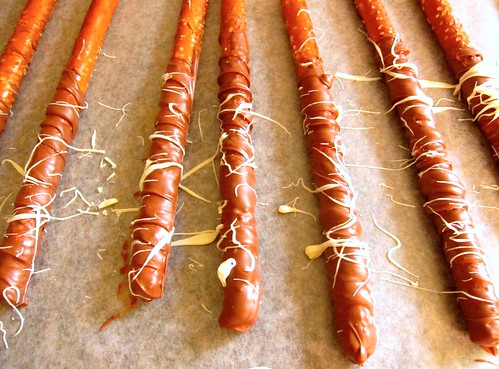
5) Dip pretzel rod into the chocolate [but not the entire rod!], take it out and put it on the cookie sheet to dry. I have found that by twirling the rod at the tip of the glass makes a beautiful pattern, and each pretzel will be somewhat uniformed - you won't have one that has too much chocolate, etc. This is the point where you can add sprinkles or nuts when you rest them on the pan.


6) You will be able to make a little over 30 chocolate dipped pretzel rods. Place all in the fridge for the chocolate to harden. Once harden, take them out of the fridge and back on the kitchen counter. [The top two resting horizontally broke]


7) In a microwavable bowl, add white chocolate and 1/2 tablespoon of shortening together.
8) Melt white chocolate - The same procedure as milk chocolate, but with 15-20 seconds per "round" as you only have 1/2 the amount this time.
9) Get a fork and stir the white chocolate.
10) This is where it gets messy. Take the fork and generously dip into the white chocolate. With a wind-shield wiper and/or figure 8 motions, whip it back and forth over the chocolate covered rods. The messier, the better! It doesn't matter what it looks like right now. Trust me, they will be perfect.

11) Put it all back in the fridge for a few hours. You want to make sure they don't smear when you put them into the treat bags.

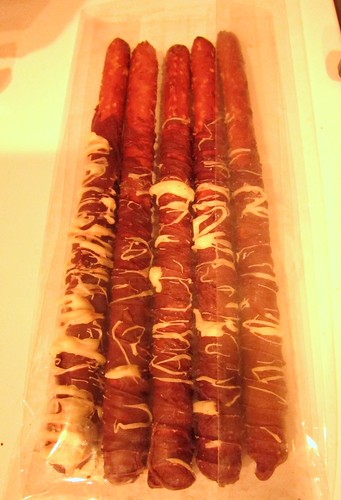
12) ENJOY!
No comments:
Post a Comment